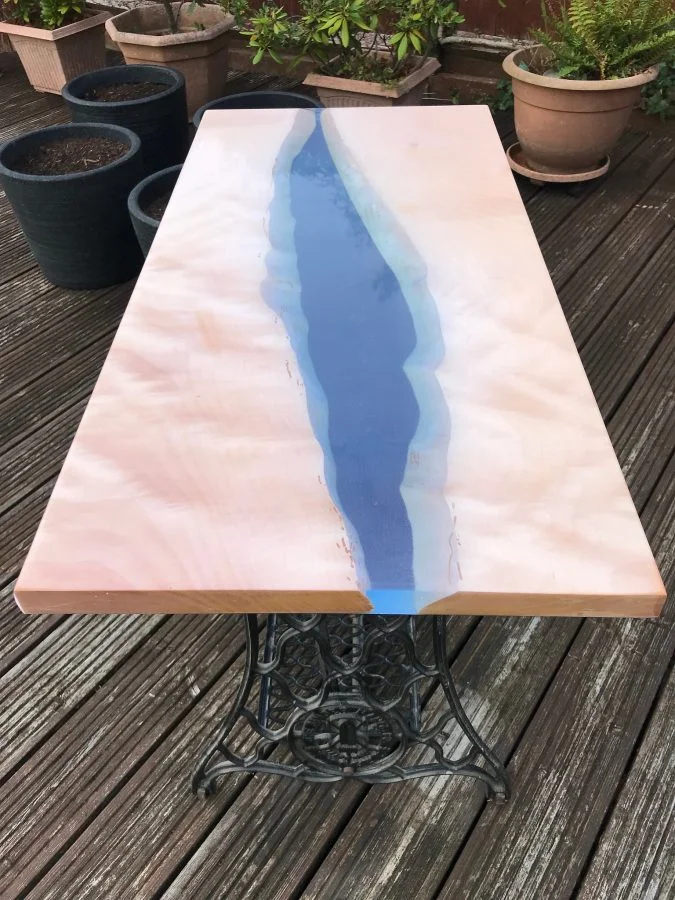
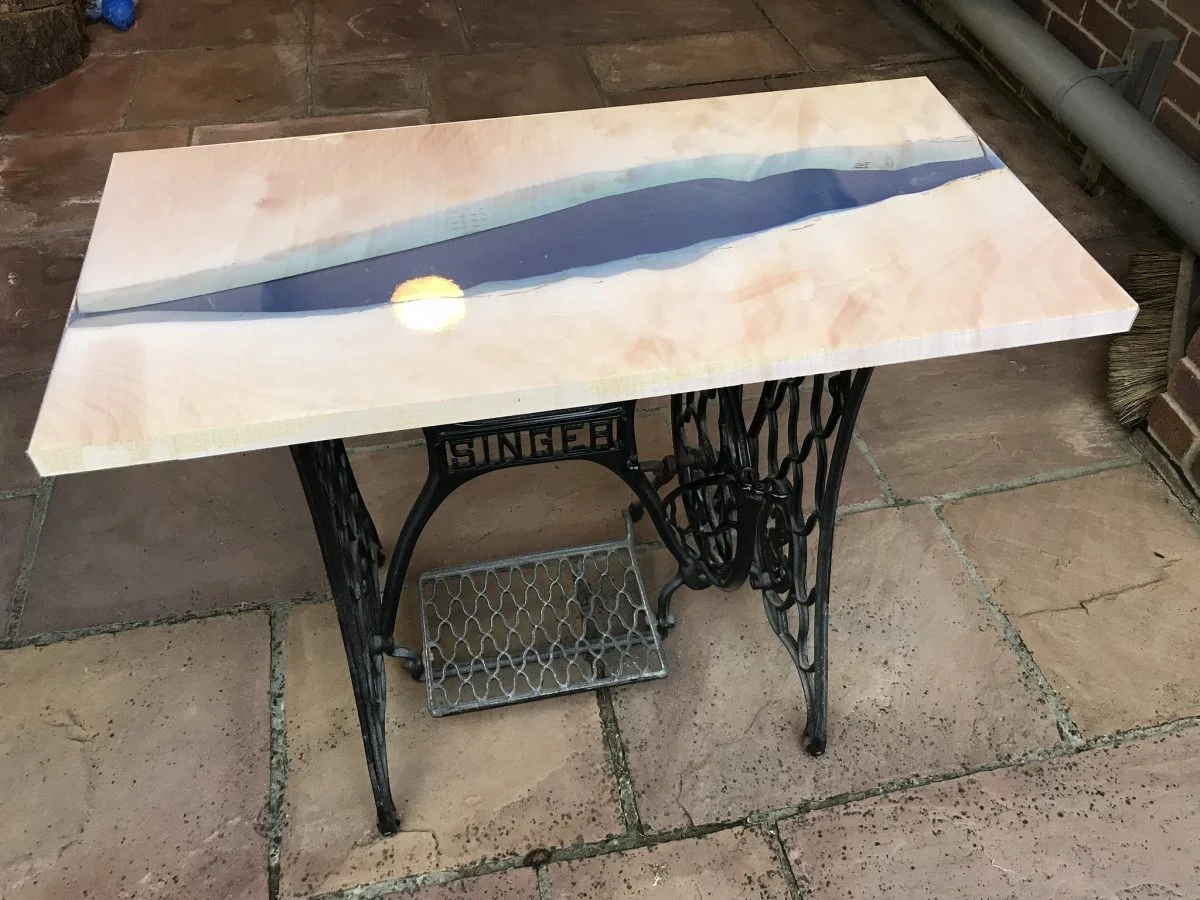
Project: Epoxy Resin River Table
As an Amazon Associate this site earns from qualifying purchases. If you buy through a link in this article, a small commission comes back at no extra cost to you.
Epoxy resin river tables can be a magical addition to any room if you have the right kind of decor. These are eye-popping pieces of furniture that can also be art. If you didn’t know what these are, here’s all you need to know.
In this guide, we give you step-by-step instructions on how to build one. Read on to find out.
What’s an Epoxy River Table?
It’s a special kind of furniture that is made by mixing and matching wooden planks and resin. It’s not for every style of interior design because it looks like there’s a flowing river right in the middle of the furniture.
But when you can find the right decor to compliment this piece of hybrid furniture, these tables add a touch of exoticism that makes the room they are in very appealing. That’s probably why even though they originated in the US, epoxy river tables are extremely popular all over the world. However, it does not limit creativity. The river flow can be modified in structure, design, and color to fit the color palette of the room.
This is a high-quality product and the combination of wood and resin creates a delicious contrast. That is probably why it works well with conservative interiors that are dominated by wood and also the modern style of furnishings that use neutral colors and clean designs.
How to Start Building Epoxy Resin Tables?
Since it is a high-quality product, these tables can be an expensive purchase. But if you are a do-it-yourself enthusiast, you will realize that an epoxy resin river table is actually not hard to put together yourself.
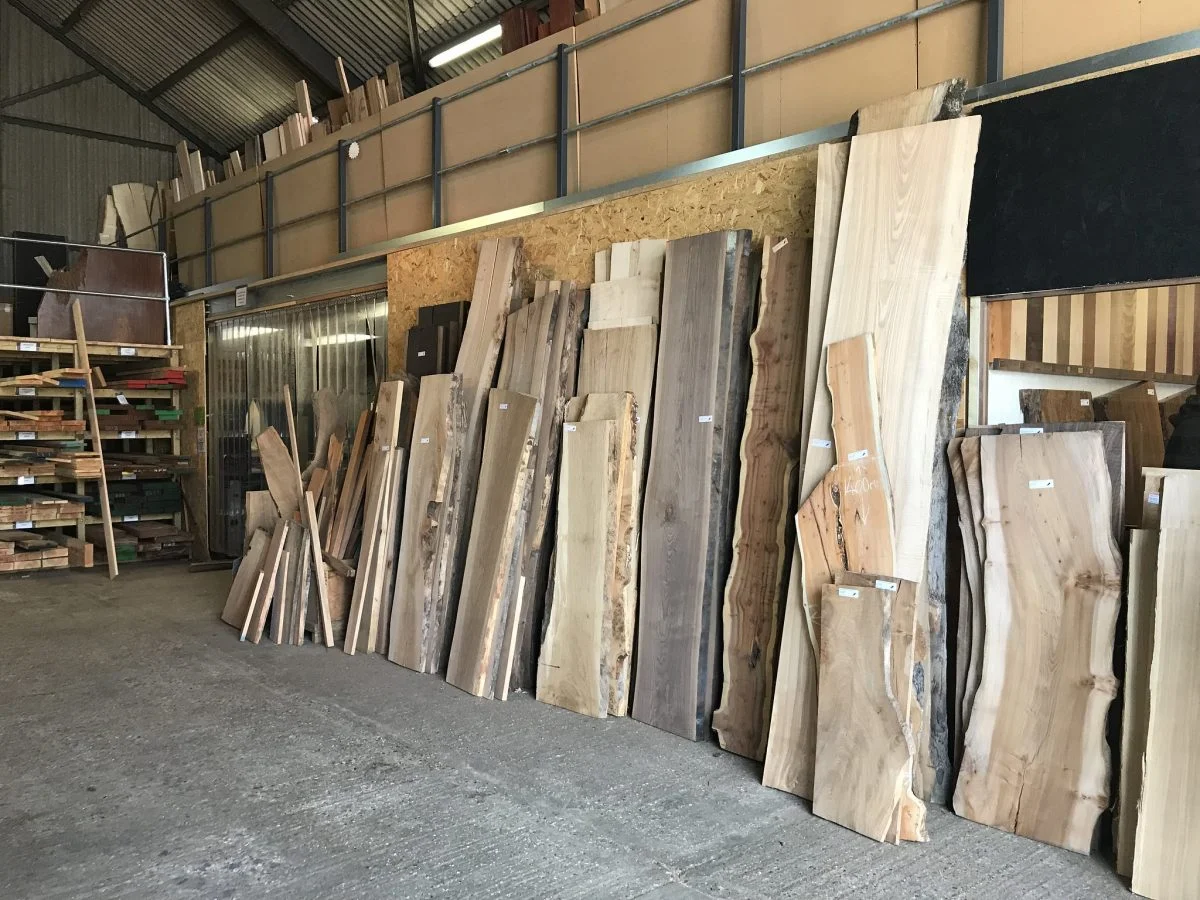
As is the case with anything you want to build from scratch, you must begin by paying attention to your raw materials. In this case, that involves procuring good pieces of wood and good quality epoxy resin. Preferably, dried wood.
But, before that, remember that if you are going to build a large piece of furniture, it is crucial that you create one layer at a time. That means you must be prepared for long phases of drying. But you will be well rewarded for your efforts in terms of the stability of the end product.
Building one of these tables does not require the skills of a master. You do need patience, practice, and a handful of inexpensive pieces of equipment to get it right.
Supplies You Need for a Resin Wood Table
Stone Coat Super Cast Resin Kit
As the name suggests, you need epoxy resin which is a very versatile material. You make liquid resin by mixing it with a hardener in a 1:1 or 1:2 ratio. This initiates a chemical reaction that can continue for 8 to 24 hours.
With certain resins, heat is generated in the process and the raw materials harden into a solid or cured state. That is just a basic way of creating resin.
But that is not the resin you use to produce river tables. Resins come in dozens of formulations, each with different properties: durability, viscosity, hardness, and maximum pour thickness.
To make an epoxy river table, you need premium-quality laminating resin and casting resin. Now, premium quality is non-negotiable because it makes the final finishing process easier. You also do not want to reach for cheap products: budget resins can contain hazardous solvents that evaporate during solidification.
Here are a few examples of both casting and laminating resins for your tabletop to help you figure out which way you want to go.
Best Epoxy Resin for Casting the Tabletop
You will be creating a mold later in the process. So, you want to get a casting resin that has a low viscosity. This is a property that defines how well a liquid flows. When making a river table, you want it to be almost watery which makes it solidify quite slowly.
We recommend the [Stone Coat Super Cast](https://www.amazon.com/Stone-Coat-Countertops-Super-Cast/dp/B07TM15HKT?dchild=1&keywords=Super Cast 1.5 Gallon Epoxy Kit (Stone Coat Countertops) ? DIY Epoxy Resin Kit for Woodworking, River Tables, and Filling Large Voids Up to 2 Inches Thick! Deep Pour Epoxy is Clear and Colorable!&qid=1631198256&sr=8-1&linkCode=sl1&tag=bbbl01-20&linkId=23d231389bfc3861b19047349779e054&language=en_US&ref_=as_li_ss_tl). We have other recommendations here.
It takes anywhere from 12 to 24 hours and that is the right way to do it. So, prepare for long intervals in between the steps of the manufacturing process. As mentioned before, not much heat is produced during the curing process which means you can process more material in one go.
The low viscosity also ensures that all the nooks and crannies in the piece of wood are covered. And since the resins are clear, you have the freedom to pick the color pigment whenever you’re ready.
Other Materials required
- Liquid color pigment of your choice (in this case, that’s matte blue)
- Metallic color pigment of your choice (in this case, turquoise)
- Mixing cups or a bucket to fit 64 ounces of resin
- Caulking gun
- 100 percent silicone caulking
- Silicon spray
- Duct tape
- Sandpaper
- Polishing paste
- Wood oil
- MDF board
- Soft mallet
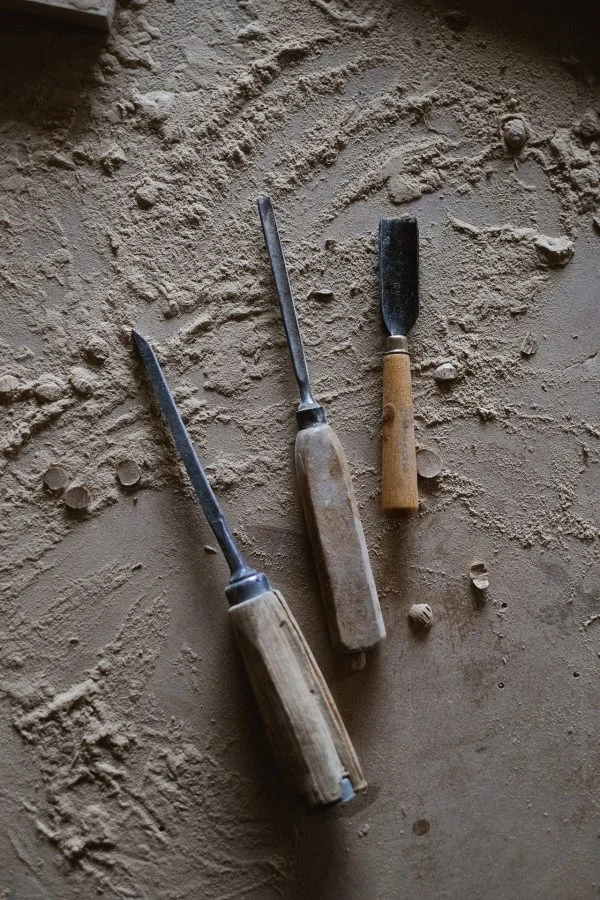
- Wood chisel
- F-Clamps
- Screws
- Level
- Carpenter’s ruler (folding model)
- Gloves
- Eye gear
- Respirator mask
- Well-dried wood panel of your choice
Machines and Equipment
- Glue gun
- Butane torch or heat gun
- Drill with a paint mixer
- Cordless drill
- Orbital sander
- Polisher
- Plunge router
Optional: Machines to Prepare the Wood Yourself

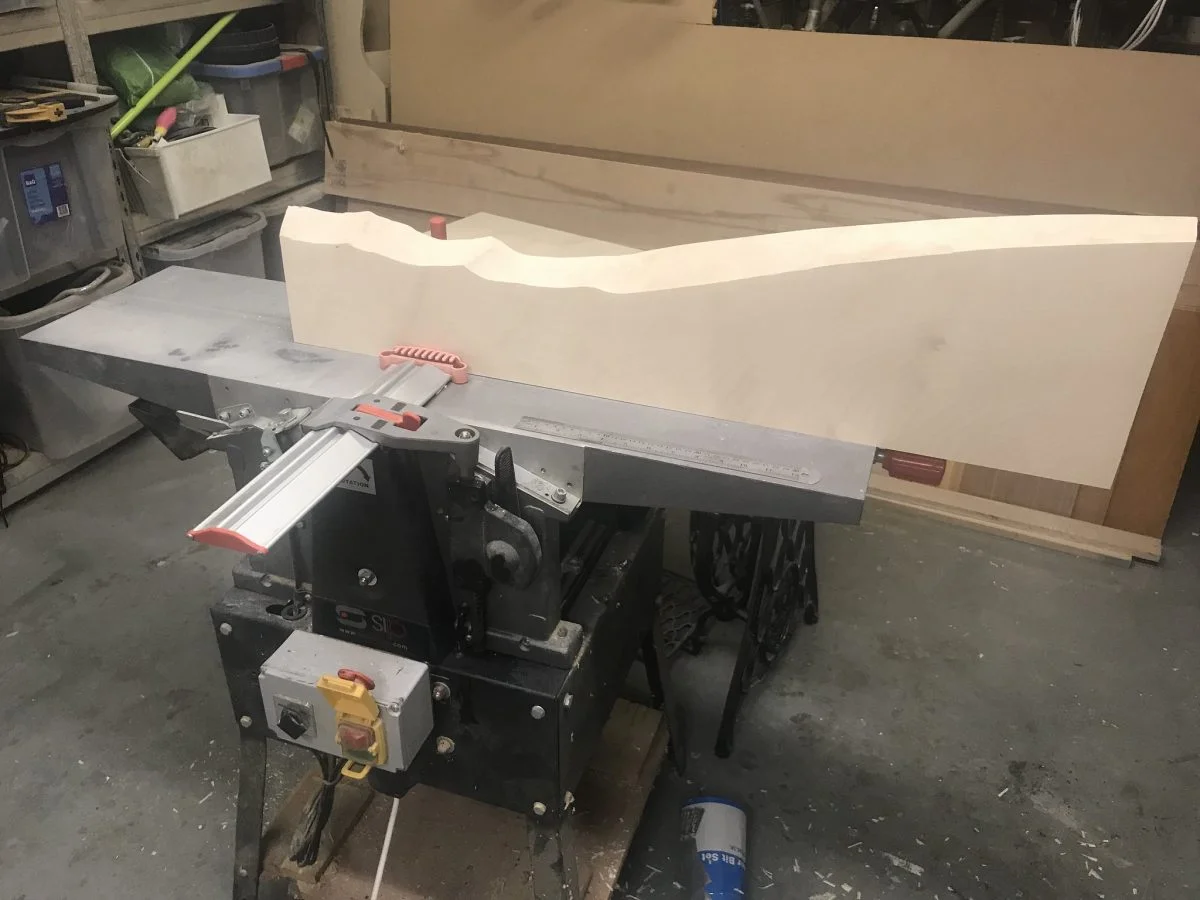
If you’re going to make the tabletop too, you will need a planing machine and a circular saw in addition to the above-mentioned tools. If that’s not an option because of the pricing or complexity, just figure out the dimensions of your choice and hire a carpenter to do the planing and sawing for you.
And, if that’s not doable either, most DIY stores stock planed boards in standard dimensions. In that case, all you have to do is cut the piece of wood to your specific dimensions.
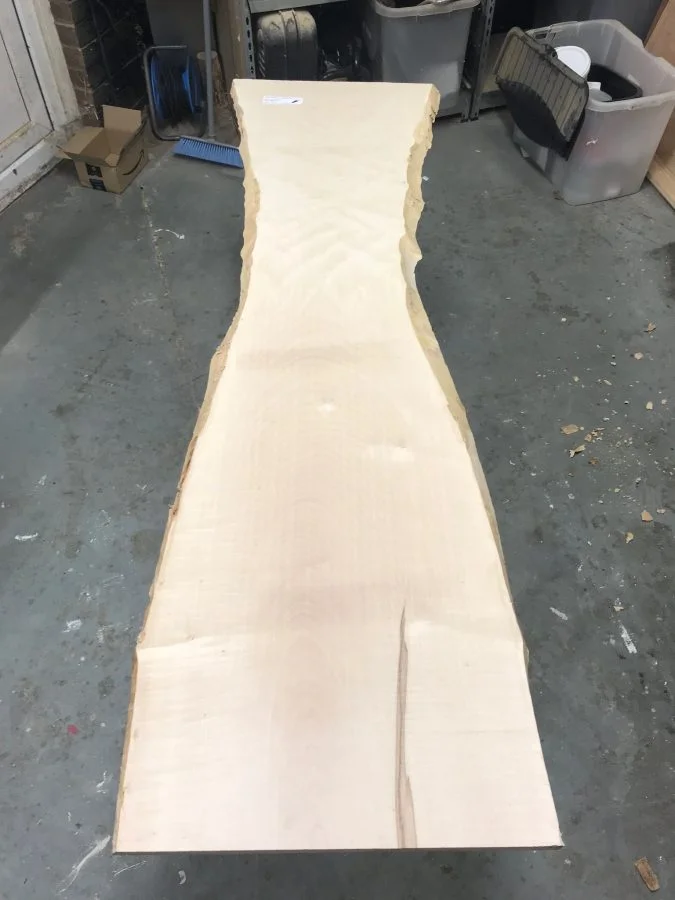
If you’re doing the whole thing yourself, start by cutting the wood according to the measurements you have already planned. Make sure the thickness of the plank of wood is even too.
You need two boards of the same length with the edges at a right angle to the outer sides. They should also be totally flat and have the same thickness. Now that you have what you need, let’s take it to the next level.
Preparing to Manufacture an Epoxy Resin Table
The preparation to make a resin table starts with the table itself. So let’s start by dealing with the wood.
-
Step one is to pick out the right kind of wood. When you are making a river table, what you need is a high-quality wooden plank that is at least 1.6 inches thick.Now, it is important to pick natural wood. If that sounds difficult, you want to get something or that is as close to that description as possible. A piece of wood which has a touch of that natural bark edges is preferred. But make sure you flatten the top with a chisel.These kinds of wooden planks are not hard to procure. Wood dealers, carpenters, DIY stores are all good options. If you’re going for the last option, you might want to get two planks of wood which can be brought to one side using a jigsaw.
-
Step two is to carefully dry the piece of wood you are going to use to below 12 percent. You might also consider seasoning the same.
-
Step three is to saw the wooden panel. You must cut it right in the middle in half by its length using a circular saw. It’s best not to substitute the circular saw with any other tool. If you don’t have it, you might want to get a professional to take care of this bit. Both pieces of wood must be of the same length.
-
Step four is planing the piece of wood. For this, you need a planing machine. Make sure that both pieces of wood have the same thickness and are completely flat.
Working Conditions to Build Your Epoxy Wood Table

Before you get started, you want to make sure that the working conditions are fit to build an epoxy resin river table. This requires you to have a workshop that is dry and free of any kind of dust. If you’re taking this project on during the winter, you might want a heated garage. But also make sure that there is enough ventilation in the workspace.
The temperature in the shop must ideally be at least 68 degrees Fahrenheit while you are setting it up and curing the resin of your choice. If the shop is too cold or hot or humid, the look and feel of the resin get affected.
This means your whole table could be ruined. One of the things to remember is not to keep the resin on the floor because it’s always a little colder than the rest of the room. When the resin gets too cold, it develops bubbles that can’t be removed even with a heat gun.
Epoxy Resin Table Guide—Step by Step to Epoxy River Table
You know what kind of shop you need, and you have the pieces of wood in the measurements of your choice. Let’s go through each step in detail.
Bark Removal and Grinding
The first thing to do is to remove the bark on the piece of wood. It looks attractive but when you are making an epoxy resin table, you want to keep your wooden planks as smooth as possible.
Remove the bark on the top and bottom surfaces with a chisel. Take sandpaper and work on the edges with your hands. Be thorough. This removal of the bark makes it easy for the epoxy resin to blend with the wood.
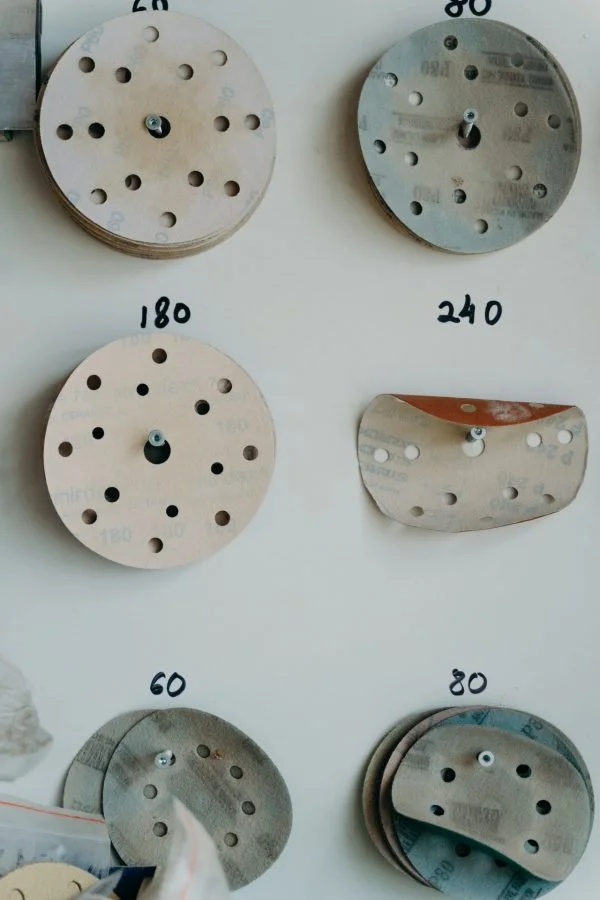
Then you must sand the wood. Using an orbital sander is a good way to smoothen the wooden planks. Ideally, you must start at 80 grits and slowly go up to 220 grits.
Remove the dust and wipe the sides with sandpaper before you increase the size of the grit each time so that the board is clear. Once you are done working on the whole piece of wood, clean the surface first with a vacuum cleaner and then with a microfiber cloth. This clears out all the sanding dust.
Filling Cracks and Sealing the Wood
The next step is to get the wood ready for sealing. Most pieces of wood are likely to have porous or uneven areas. Sometimes, there will be cracks too. These areas must be filled with the epoxy resin of your choice.
However, you want to use resin without any color component for this step. Before adding resin to the table, you might want to make sure that the edges of the table are secured. This is to ensure that the resin does not drip off the edges. So, you do that using duct tape.
Once you finish curing the holes and the cracks, you must seal the wood with resin. Once again, use a crystal-clear resin generously and seal the entire surface using a brush. This keeps the wood from gassing out, in case your choice of wood has those tendencies.
After finishing the sealing process, you want to dry the table for at least five hours at a temperature range of 64 to 74 degrees Fahrenheit. But this varies from resin to resin.
Read the manufacturer’s instructions carefully. Once you finish this step, you must roughen the edges using sandpaper. The wood and the cast resin or river meet at these edges. When you make the edges rough, the resin bonds better.
Build Your Mould for the Resin Tabletop
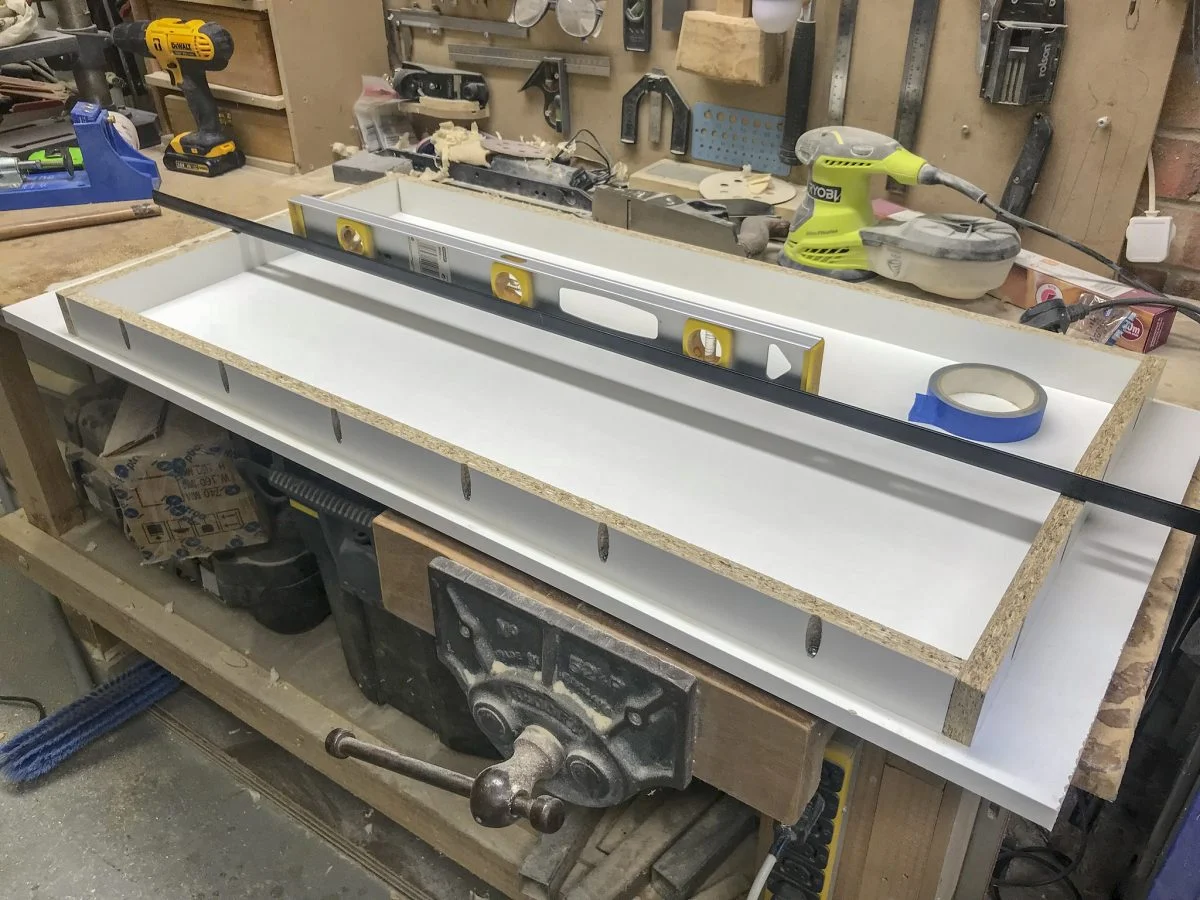
Now comes the big but not-so-difficult step. You need to cast a mold of epoxy resin for the river table. This needs to be assembled with boards of MDF wood. So, get them in the same length as your wooden planks for the river table. And make sure the measurements are accurate.
The MDF wooden boards must be 15 mm on the bottom and the side panels which will be fixed to the underside must be 10 mm higher than the final tabletop. You can fix them up with screws or hot glue.
To seal the edges, you will need to use clear silicone. And remember that if you mess up any part of this, the final form won’t be as tight as you need it to be.
When you’re making the mold remember to keep the workspace even and in balance. If you don’t, the resin can leak or become crooked. Once the mold is ready, apply the release agent to it with glue or duct tape.
This is to stop the resin from sticking to the MDF wood or parts of the mold that are prone to get attached to the resin table. If you don’t have glue or duct tape, liquid release wax, Teflon spray, and silicone spray are acceptable alternatives. The last one works up to three layers.
Fixing the Wood into the Mold
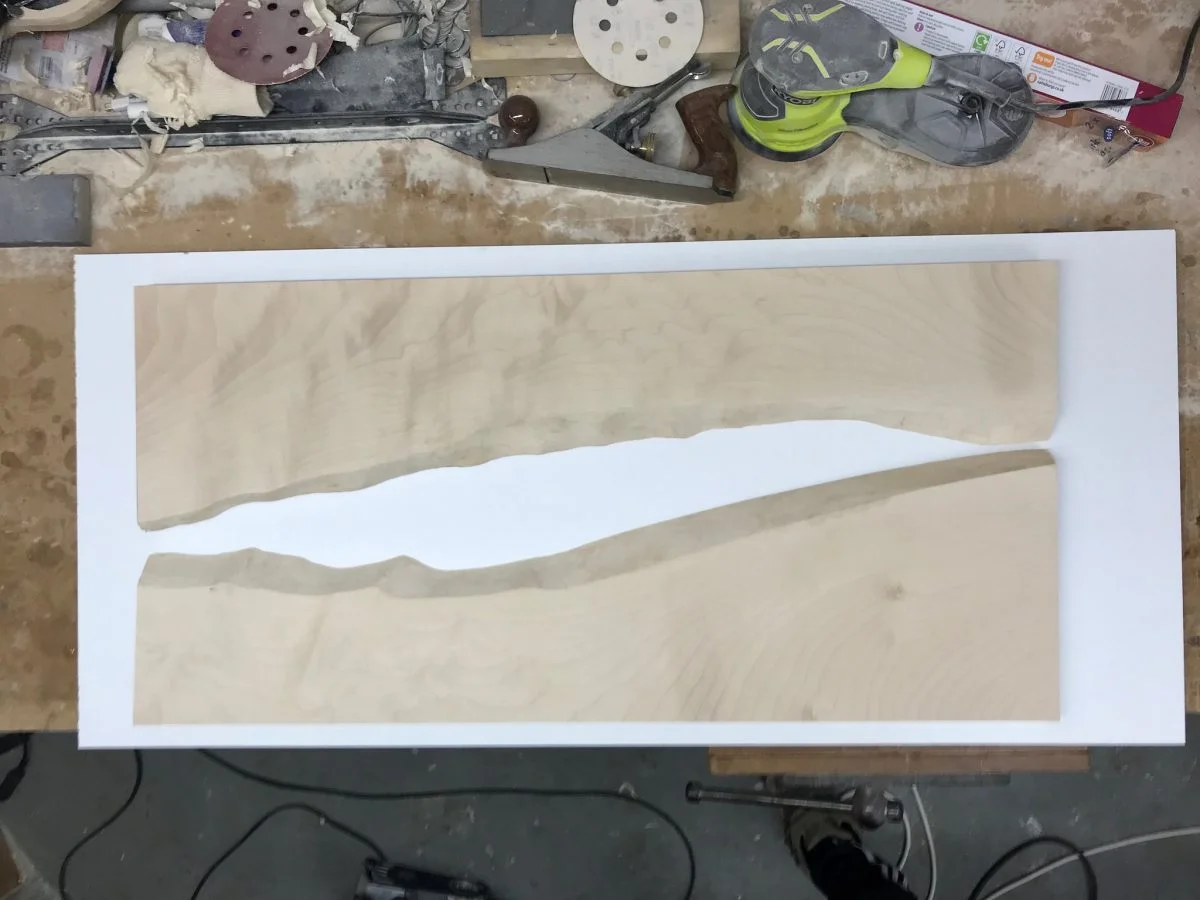
After adding the release agent, it is time to insert the wooden planks. Using parallel clamps, you must insert the wooden planks according to your final design. If you’re making a small table, consider using bricks instead of clamps. That works just fine.
Next, add a sanitary silicone barrier along the edge of the river and the wooden plank because whatever you use to insert the wood will touch the mold too. The barrier must be about 0.4-0.8 inches away from the edge so that you can pour the resin without any trouble.
Calculate Epoxy Resin Quantity—Calculator
Now it’s time to determine how much epoxy resin is needed for a river table of your choice. Thankfully, you don’t need to be a professional to know this. So, you need to know the quantity of epoxy resin and also the hardener and resin mixing ratio. All of this can be done with the help of calculators online.
Mixing Epoxy Resin
It’s time to gear up for this step. Get your gloves, goggles, and respiratory mask out. Once you have your protective gear on, get the mixing cups or bucket you have procured to mix the resin.
Figure out if you will be doing this layer by layer or all at once. This depends on the kind of resin you are using. Pick a bucket or mixing cup accordingly.
You need to determine the level of thickness depending on the layers you are going for. Keep in mind that certain resins become quite hot and can even reach boiling temperatures when poured too thick. They start to turn cloudy when the resin boils.
Follow the resin manufacturer’s instructions to check the maximum thickness per layer and save your raw materials from getting ruined. This also applies to the mixing ratio. Check the instructions before you start the process so that you mix the components optimally.
Once the mixing is done, use a butane torch or a heat gun to remove the bubbles in the resin, if any. Don’t overdo this because too much of it can damage the resin. Sometimes, all you need to do is swing the torch over briefly.
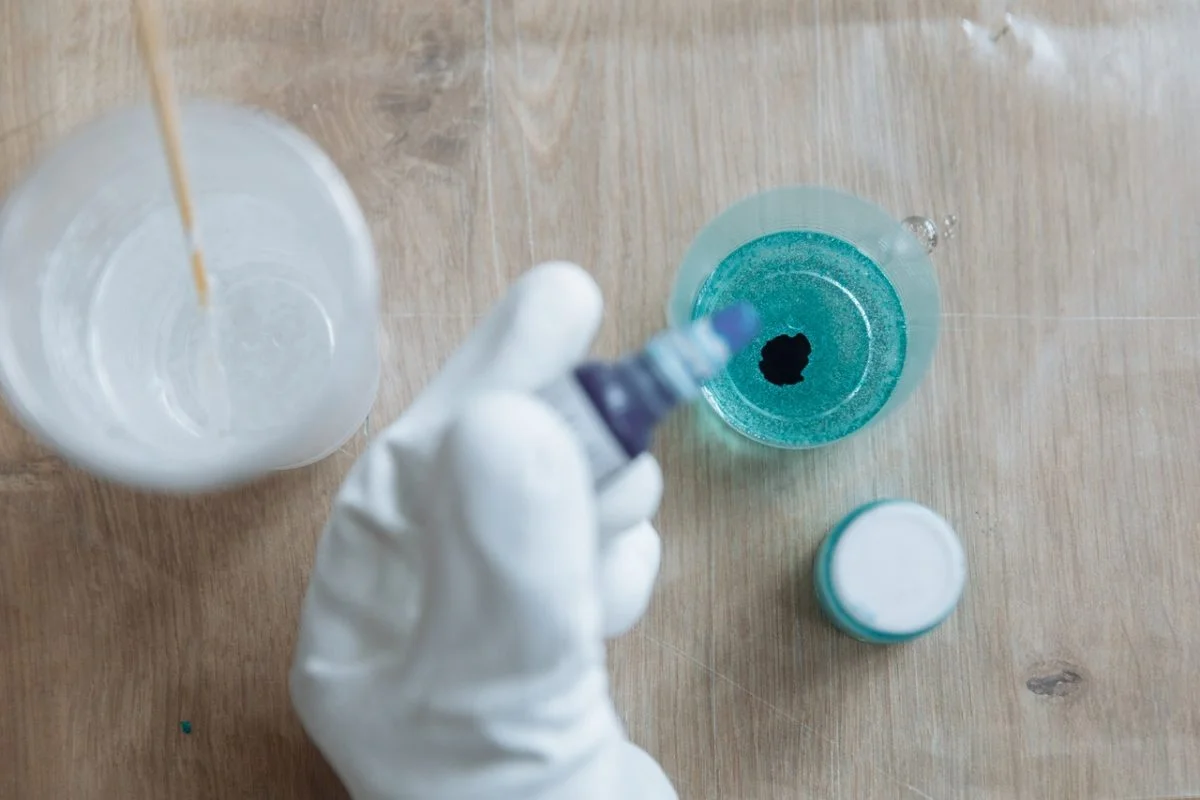
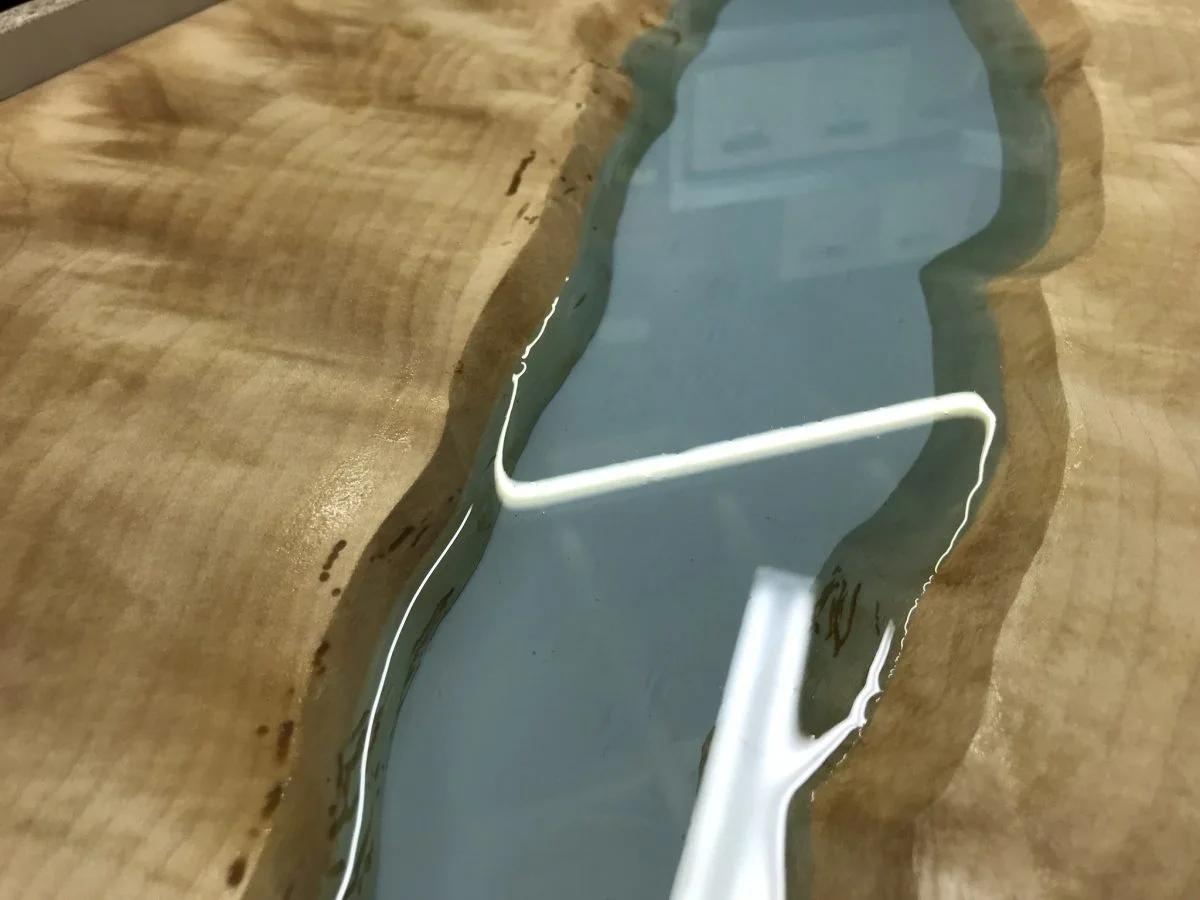
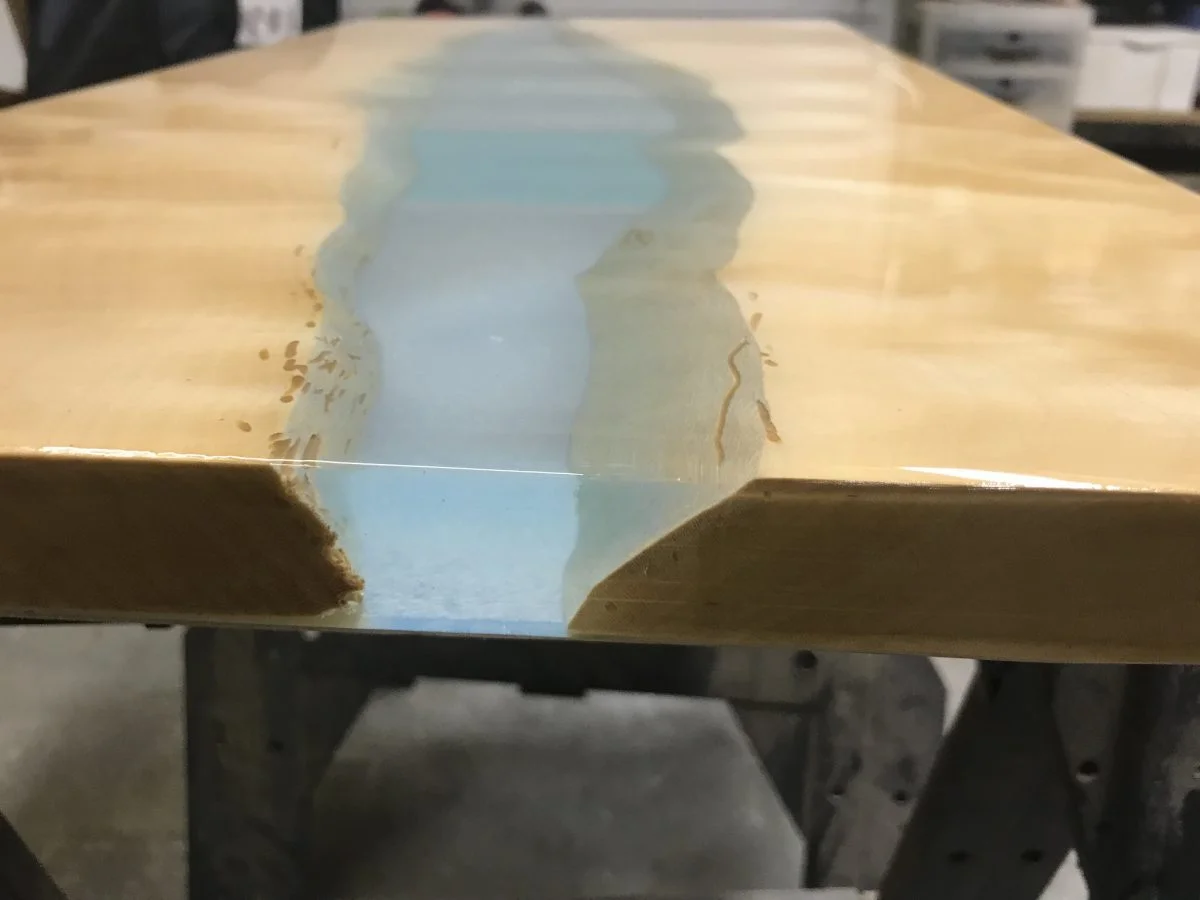
Coloring the Resin and Pouring a Water Effect
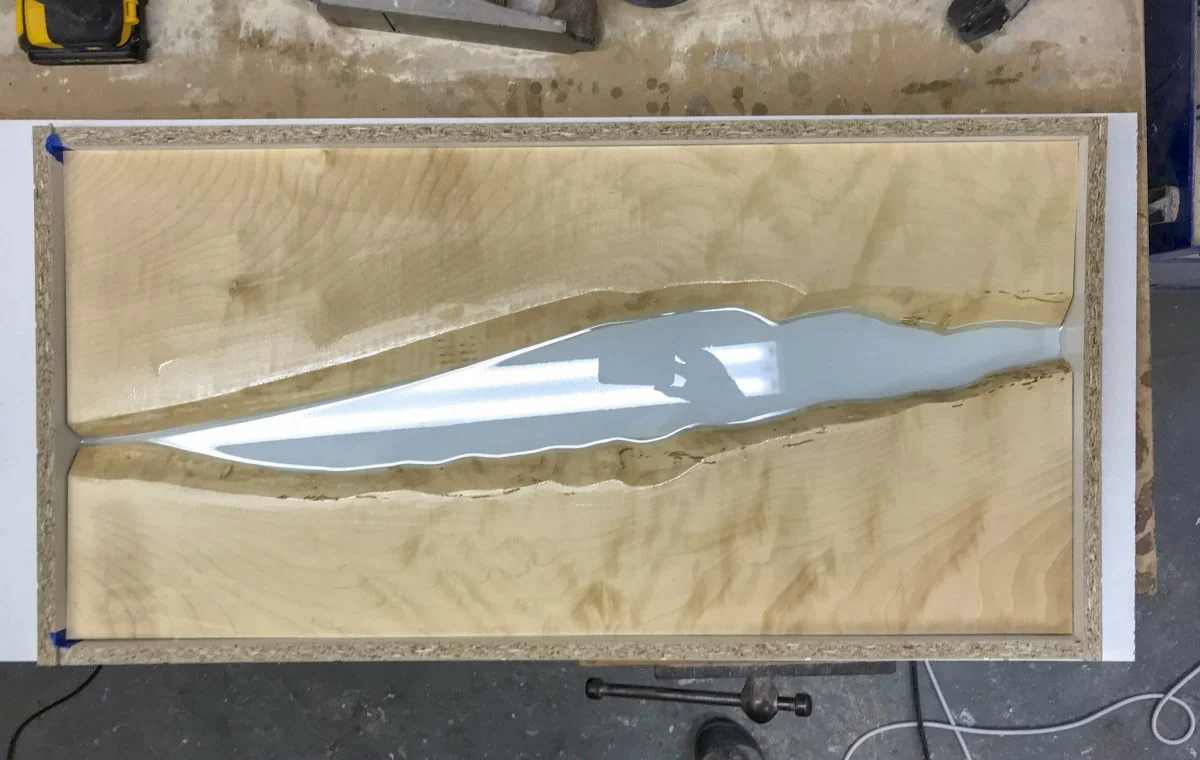
If your river table is going to have colors, you have a few important steps in the process. You can either do this in layers or in one go. If the latter sounds better, you need to get a special epoxy resin. Start by mixing the two resin components and adding the color pigments you have chosen for your table.
Fill two containers with the resin in a 1:1.5 ratio. Let’s say you have picked a matte blue color pigment and a turquoise metallic pigment. The smaller proportion (1) of the resin should have the blue and the larger proportion (1.5) should have the turquoise. This will give your river table the classic water look.
Pour them both into the mold. You can do this simultaneously from one side or one after the other. However you choose to proceed, you must move it in a circular fashion gently while pouring. This really nails the water effect.
After everything has been added to the mold, use the likes of a wooden stick to arrange the pattern to your liking. Wait till everything is hardened. Check the manufacturer’s instructions to figure out how long that will take.
River Table with Crystal Clear Resin and Optional Embedded Objects
On the other hand, if you are making your river table crystal clear—meaning without color pigments—here’s how to go about it.
Pour the first layer of epoxy resin carefully but quickly. Use the butane torch or heat gun to remove the bubbles. Make sure you don’t keep the torch in place for more than three seconds because that might burn the resin. And since you’re not using color, the end result will be yellow if you steam or burn the resin.
You need to move in quickly here. Before the first layer is completely cured, you must get started with the second casting. This is also referred to as the B-stage.
At this stage, the first layer feels like the inside of duct tape which means it isn’t liquid but it’s not completely cured yet. You can check that by gently poking into it. But be sure to wear gloves.
When it reaches this fluid state, go for the second layer pour. If you wait for it to get drier, this second layer won’t bond with the first one. But in case you made that mistake, just wait for it to dry completely.
Then sand it with 220 grit, clean it and add the second layer. Pour it right above the edge and wait for the curing process to finish. Take a look at the manufacturer’s instructions to figure out how long that will be.
Since you are doing a crystal clear river table, you might want to add decorative objects like crystals or pebbles. That’s a good idea and must be added to the B-stage. If you do it before, your ornaments will sink like the Titanic.
Demoulding the Epoxy Resin Tabletop
This step needs to be done gently so that the tabletop does not get damaged. You’ve put in a lot of work and getting this wrong might ruin it all. Start by removing the clamps and screws, if any, on the mold. Using a chisel or a plastic hammer, make sure the mold and the cast tabletop are completely separated.
Sanding Your Tabletop
Once the plate is separated from the mold, you must sand the tabletop. You can do this with your hands but it is much easier to get it done with an eccentric grinder. These are preferred and highly recommended by professionals too.
Start with 80 grit and go up to 400 grit. You can also use a router to smoothen the edges. But if you do, do it before starting the sanding process because you might have to trim or plane them using a circular saw.
The Final Finish
There’s more than one way to do it and the choice is yours.
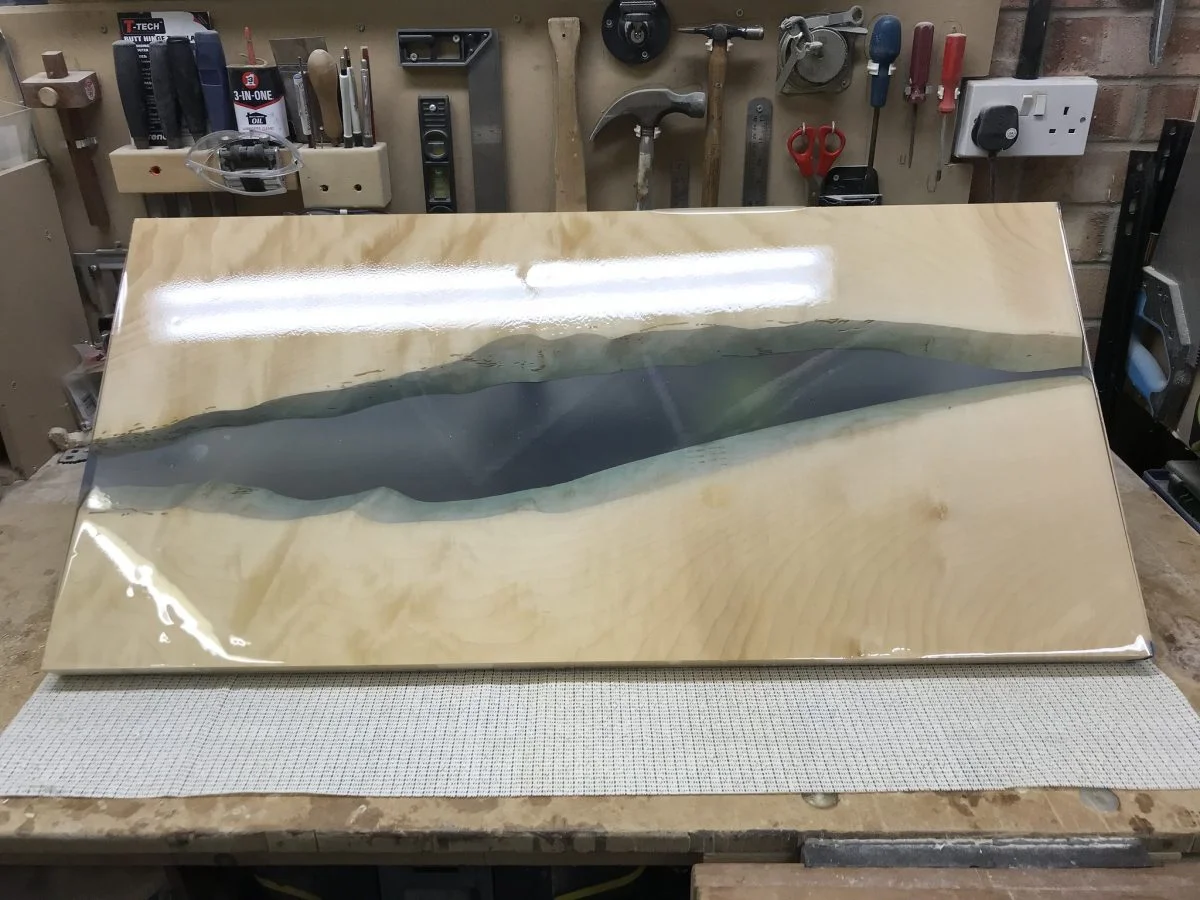
Resin Tabletop Polishing
Before you go for a finish though, remember to polish the epoxy resin. It’s an important step and helps you remove any scratches that might have occurred during the sanding process. If you’re doing tabletops, using a buffing machine is a good idea. But if it’s something small, you will be just fine using your hands.
Tabletop Oiling
Oil is one of the easiest finish options regardless of furniture size. It also doubles as a protective layer. The surface looks smooth and has a natural shine to it. If you pick the right brand, you do not have to repeat the process. Just one coating seals the deal.
Even for this, you must polish the surface first with a polishing paste or machine. Then, use a clean cloth to apply the oil on the surface.
Clear Resin Coating Your Tabletop
DIY crystal clear resin coatings come in a handful of formulations. Apply in layers. First, run 0.4-0.8-inch tape along all four sides of the table to prevent the resin from dripping over.
Start by pouring the resin on the underside of the table and spread it evenly across the surface. This first layer anchors the finish; a plastic spatula makes spreading easier.
Also, keep your heat torch handy so that you can get rid of the bubbles that will invariably be formed. But this time, allow the resin to dry completely.
When the first layer is cured, make sure you sand it properly before pouring the second layer. This helps them bond properly. After the second layer is also cured, take the tape off the edges.
You have been working on the underside of the table till now. Now it’s time to turn it over. At this stage, the table must be properly balanced and the painted underside must be secured with a soft underlay. Something made of fleece is recommended.
Repeat the same process on the upper side of the table. Once it is done, sharpen the edges if required. And you’re done.
Polyurethane Coating
Our final recommendation is a polyurethane coating which is a highly glossy varnish. You will need dedicated spray equipment, practice with the technique, and a proper painting booth.
That’s why it is mostly done by professionals and is expensive too. But if you can afford it, the finish is totally worth the money. Your tabletop will be smooth and look like a mirror. It also keeps the table durable and scratch-resistant.
Suitable Table Legs for Your Epoxy Resin Tabletop
Now it’s time to put the legs on your gorgeous epoxy resin river table. Here, the choice is yours. From wood to metal, there are plenty of options in the market.
Different Types of Tables to Build Yourself
River tables are extremely popular not only because they are beautiful but also quite functional. Each of these forms can be built following the tutorial above.
- Coffee table
- Dining table
- Garden table
- Sideboard
- Side table
Frequently Asked Questions
Q: How much epoxy resin do I need for a river table?
A: This is not a simple question. You need to know the measurements of the final product and also the space you will be filling in. Use an online calculator to be sure.
Q: Can LED lighting be molded into the tabletop?
A: Yes, it is actually quite easy. Just make sure the casting resin doesn’t get too hot because it will melt your lighting. Also, get high-quality LEDs because you can’t replace them. The connectors for the light can be fixed later on.
Q: Can I use a tree disc as a resin table?
A: Yes, cross-cut tree slices are also an option. In any case, make sure the wood is dried. Hot glue the discs and fill the cracks a couple of times. Finally, seal it with epoxy resin.
Q: How much does a river table cost?
A: If you’re going to build your own, you have to get the epoxy resin, wooden slabs, and whatever other tools you need but don’t have. Those are the biggest expenses. If you don’t need to buy any tools, it will cost you about $400. If you’re buying the whole table, expect it to be anywhere from $2,000 to $4,000.
Q: What is the best Epoxy Resin for Tables?
A: You need high-quality casting resin. The recommendations are in the piece.
Epoxy resin river tables can be a magical addition to any room. But you must have the right kind of decor. These are eye-popping pieces of furniture that can also be art. So, the rest of the decor must rise to its standard. If you didn’t know what these are, here’s all you need to know.
Photos are courtesy of Steven Vacher, UK. Thank you Steven!
Written by Vince
Vince is a woodturner and the founder of WoodturningOnline. He writes tool reviews, buying guides, and turning tutorials to help woodturners at every level make informed decisions about their craft and equipment.