Many times I’ve glued up rings only to discover that when mounted on the lathe, they are off-center. In some cases, there is enough material to turn away and make the assembly round and keep the design. But often, particularly with feature rings that are usually only ¾” thick, the bowl is ruined.
If the feature ring is off just 1/8”, then the ring will need 1/8” turned off the inside and another 1/8” turned off the opposing outside. Now your ring is only ½” thick and may not support the design you are trying to make.
I’ve tried various tips and tricks, but none worked in all circumstances. The following setup that I use now, does a great job in keeping all the rings centered as they are glued up.
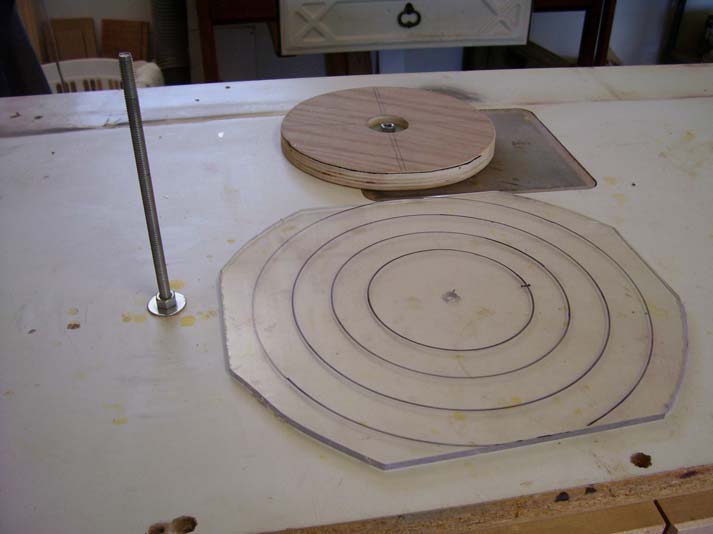
The components are few and simple. First, I mounted a 5/16” threaded rod in the cabinet on top of my router table. I checked the vertical for squares on two sides and adjusted as needed.
Second, I cut a plexiglass piece large enough to cover the largest-sized ring I plan to make. Using a compass and a black marker, I drew circles in 1” increments. Finally, I used the center mark to drill a 5/16” hole in it to fit over the threaded rod.
Third, I cut a disk out of ½” plywood and drilled a 5/16” hole in the center.
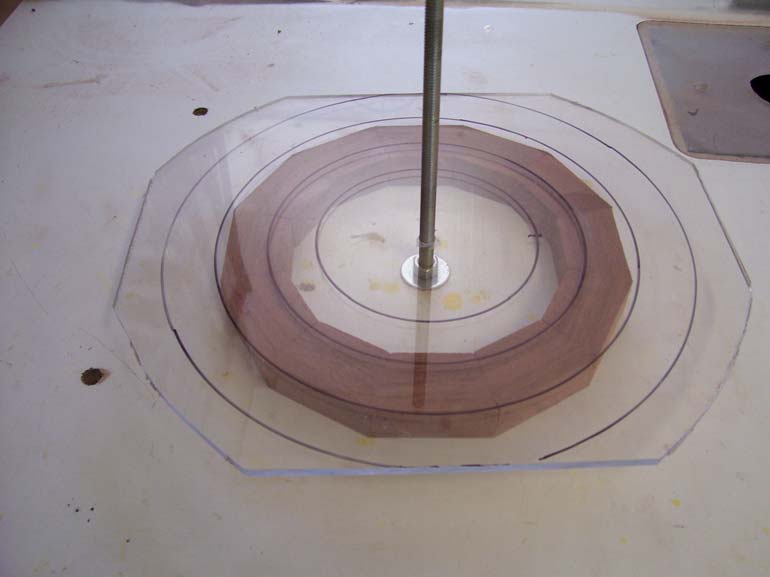
To use, place your ring over the rod and slide the plexiglass down over it. Using the drawn circles as a guide, move the ring until it is centered.
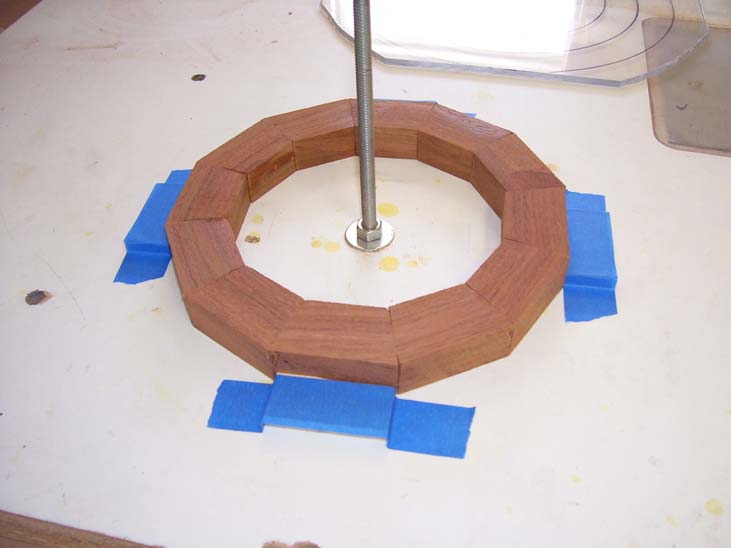
I then carefully remove the Plexiglas and with a pencil, mark the tabletop where the ring sits.
Then I tape four small pieces of wood next to the ring to prevent it from moving as additional rings are stacked.
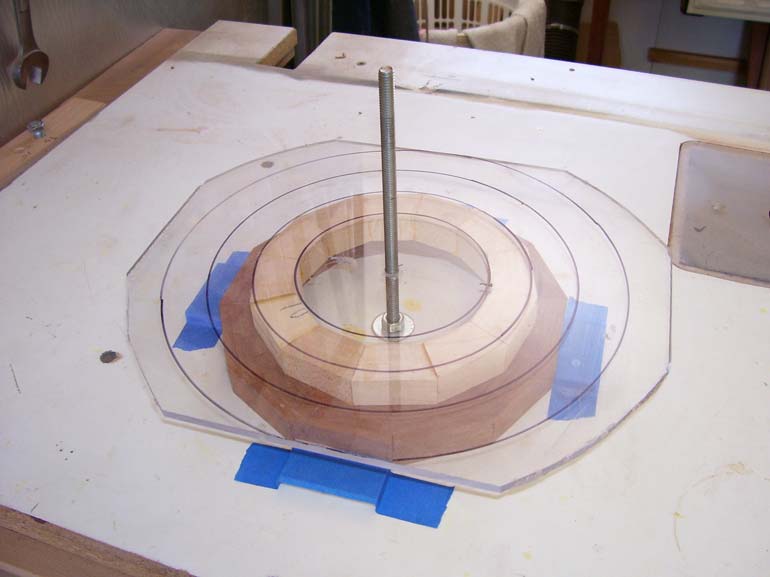
The additional rings are centered in the same manner. I usually will glue the second ring and hold it steady for a minute by hand. That’s enough for the glue to hold it in position while the next ring is added and centered. Normally, I won’t glue more than three rings at a time.
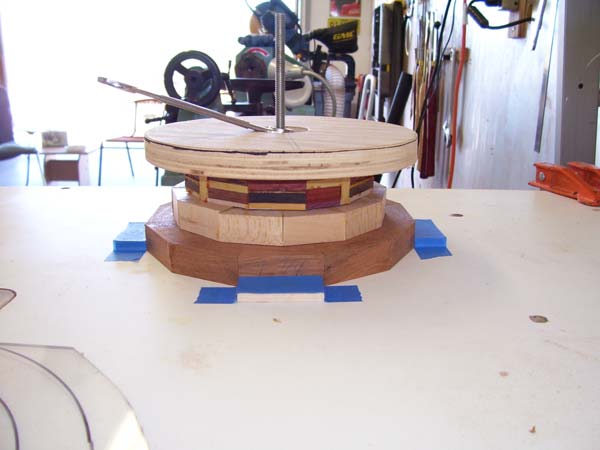
The plywood disk is slid down over the assembly and the nut is turned down tight, putting pressure on the glued rings. I allow about an hour and then add the remaining rings if any.
To mount the assembly to the base, I first mount the base on the lathe and turn it around. Then I put the ring assembly on another piece of ¾” plywood (using small pieces of double-sided tape) with a center hole cut to fit the lathe’s tailstock.
Bringing the tailstock up to the base plate will center the assembly on the base.
After the glue sets (I leave it overnight) you’re ready to turn and the whole assembly should spin nicely.
