Turning Wooden Spoons With Hand Carved Bowl
As an Amazon Associate this site earns from qualifying purchases. If you buy through a link in this article, a small commission comes back at no extra cost to you.
At a recent craft fair while displaying my wood-turned items a lady asked if I could make a "sturdy" wooden spoon. It would seem that her store-bought wooden spoons kept breaking.
My first thought was "how sturdy do you want". So I stopped by her home to see her "old sturdy wooden spoons" which upon close exanimation appeared lathe-turned.
After studying them I came up with the following process for making lathe-turned wooden spoons. Obviously, this is not a new idea or method but have not seen it published before, I will venture forth with my interpretation.
As far as blanks go, I recommend these:
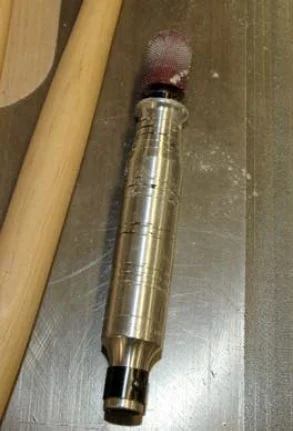
Hardwood Spoon Carving Blanks on AmazonThis is a combination of standard spindle turning and off-center spindle turning. I generally only use a ½” inch spindle gouge but if you are good with a skew it should work well. I use a live cup center in the tailstock and a dead cup center in the headstock for a drive, which allows for slippage if you get too heavy-handed. The cup centers tend to hold the wood together rather than splitting it.
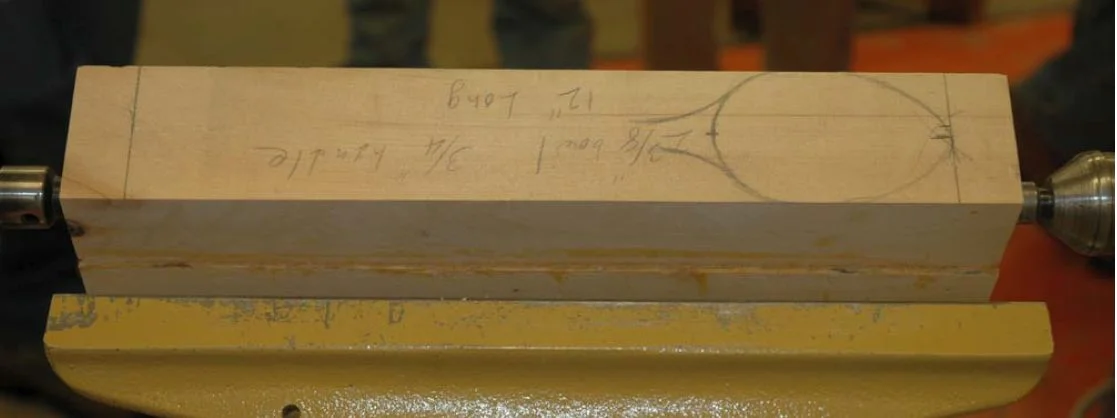
To prepare the blank decide on the bowl diameter, the length of the bowl and the handle. Add ¼” to the diameter, and I inch to the length for waste.
Prepare two blanks at those dimensions, as you will be turning the outside of the bowl(s) of two spoons in the first step.
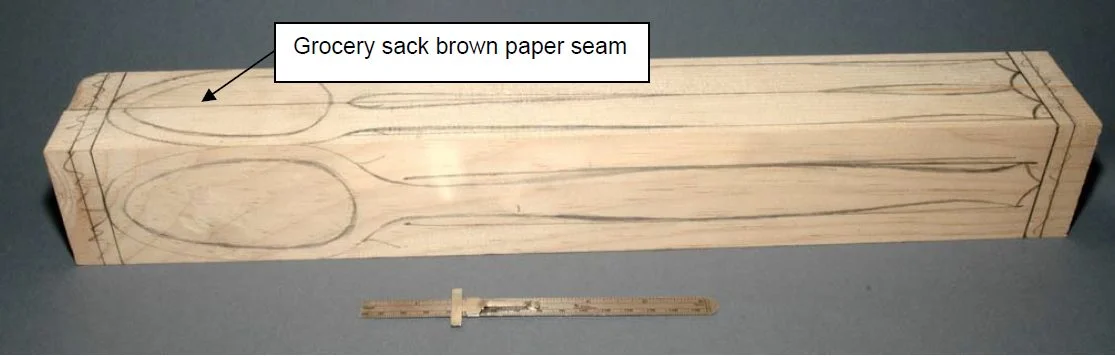
Using yellow carpenters glue, glue the two blanks together with a layer of brown paper grocery sack between. This will allow for the splitting apart of the two spoons after the bowl is turned. Allow the glue to dry thoroughly.
 Bowl End
 Handle End
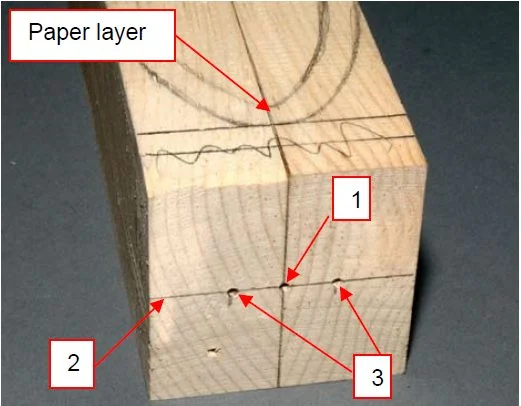
Mark both ends of the blank for mounting on the lathe:
- Make a mark centered on the paper layer centered top to bottom.
- Mark a horizontal across the center mark perpendicular to the paper layer.
- Make a mark corresponding to the radius (1/2 the desired diameter) of the handle on each side of the paper layer on the horizontal center line.
- With a compass, scribe circles corresponding to the desired handle diameters centered on the marks made in step 3 on the handle end.
- From the mark made in step 1 on the handle end, scribe a circle two times the handle desired diameter. These circles will be used as indexes for rough turning to the diameters as we go.
Mount the blank between cup centers on the lathe, positioned at mark #1 on both ends.
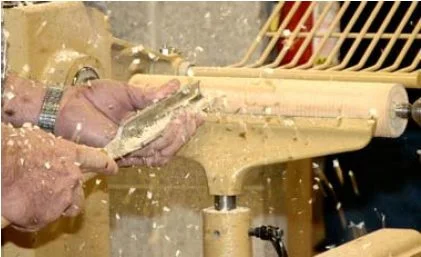
Turn the blank to a cylinder at the maximum diameter of the block, then make a mark on the cylinder ½” inch from each end and at the handle/bowl transition. At this point the handle area and the ½” inch of waste on the handle end can be turned down to the circle on the handle end marked #5. Do not go smaller than this, as you need that stock for the off-center turning of the handles.
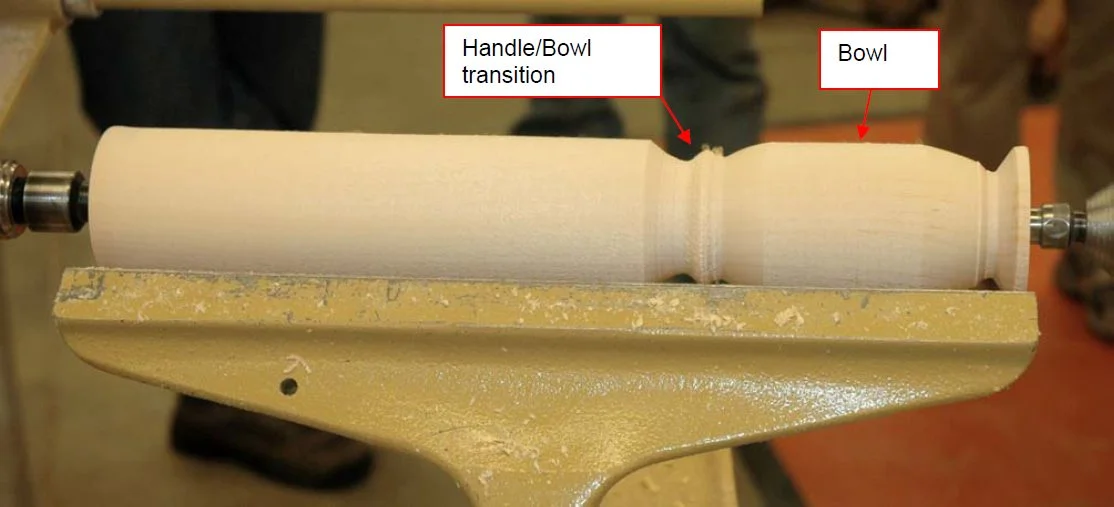
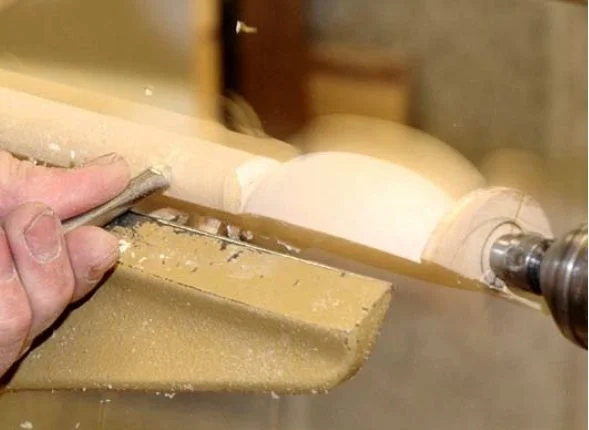
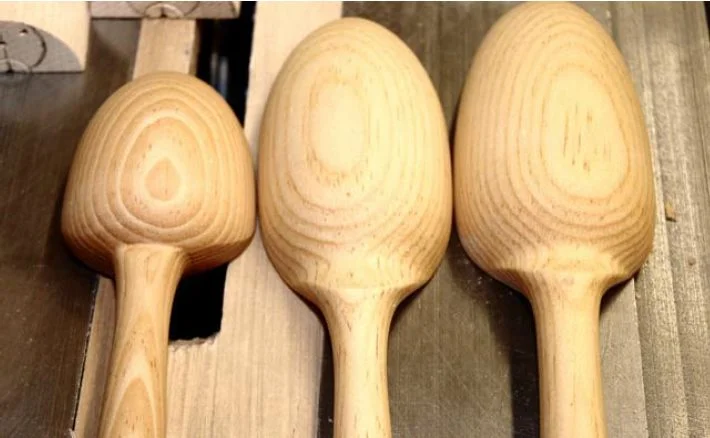
Now shape the spoon bowl. There is a bit of trickiness to this and it took careful figuring to get it right. First, the waste at the bowl tip may be undercut, but do not go less than two times the radius of the handle (circle marked in step 5). This will allow further shaping of the bowl tip. Second, at the handle/bowl junction make a flair or arc from the bowl to the handle … this will give strength to the handle/bowl connection. If you turn sharply in towards the handle at the top of the bowl, only a small area of end grain supports the junction, and the handle will pull out of the bowl. Sand the spoon bowl at this time, as the centers will be lost when the blanks are split apart.
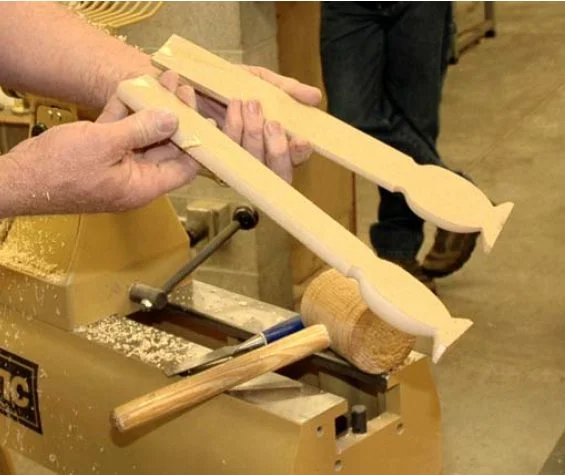
Remove the blank from the lathe, set the handle on a solid surface, position a chisel across the paper glue line, and rap the chisel lightly. The paper will easily separate and you are left with 2 spoon blanks with the bowls turned.
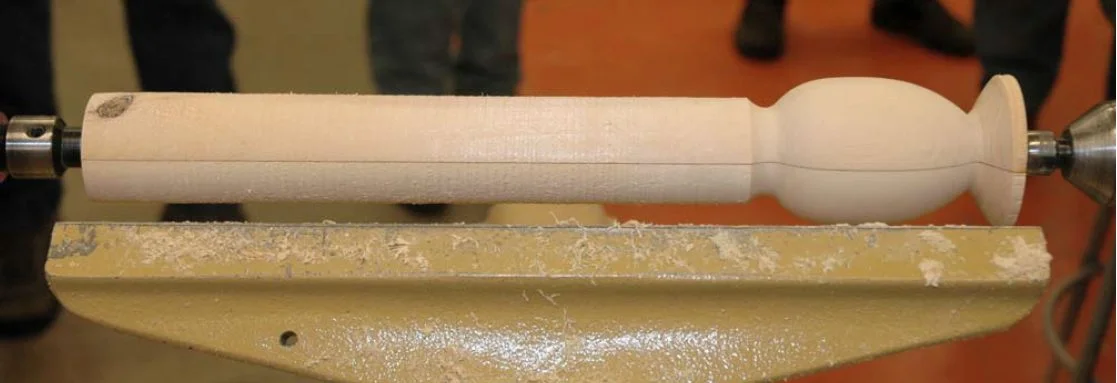
Mount one of these blanks between the cup centers on the centerline of the desired handle, the spoon bowl will be off-center. Use mark #3 on both ends.
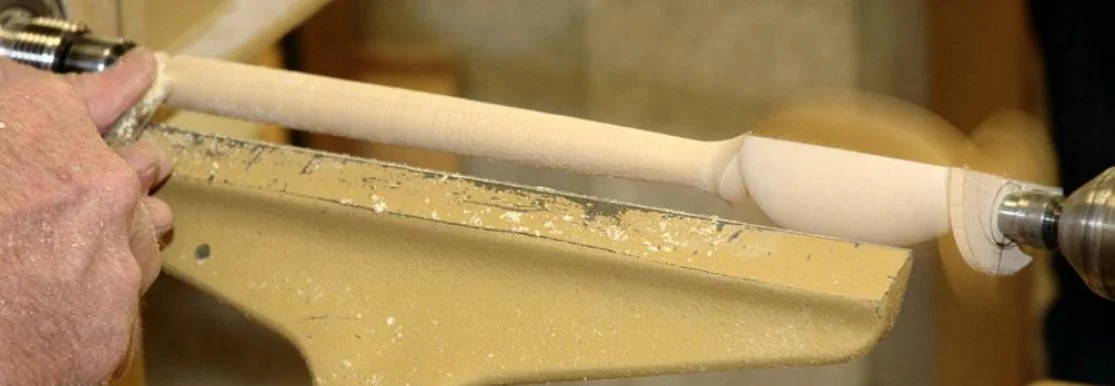
Snug the tailstock with enough pressure just to maintain drive force. Gently turn the handle area down to a cylinder while maintaining the arc flowing from the bowl to the handle.
This is the third tricky part. Watch the ghost image of the spinning blank to see the transition of the bowl into the handle. You will be shaping the handle/bowl junction while maintaining the arc. Stop the lathe every minute or two to see where your cut is contacting the bowl and handle, go slowly. There will be a shape developing which is very characteristic to the centered/off-centered positioning. As long as you don't thin the handle too much or turn too sharply from the bowl into the handle it should work out fine.
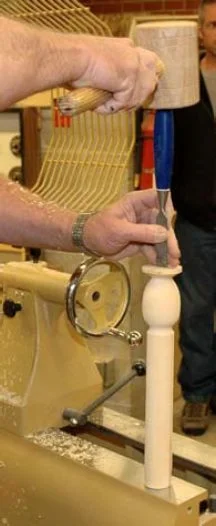
Shape the handle to whatever profile suits you — straight, tapered, or with a gentle cove — then sand it through the grits. At this point, you may turn into the waste areas as much as you are comfortable with.
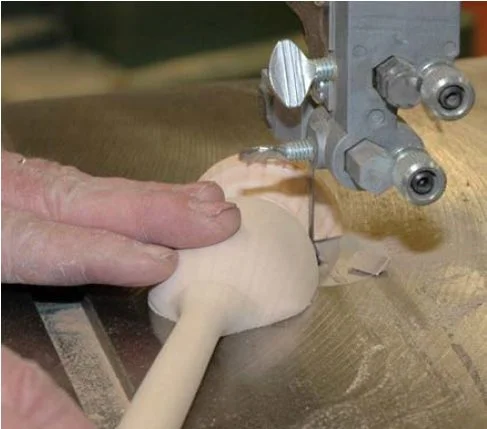
Remove the blank from the lathe and trim off the waste ends, blend in, and finish sand the ends.
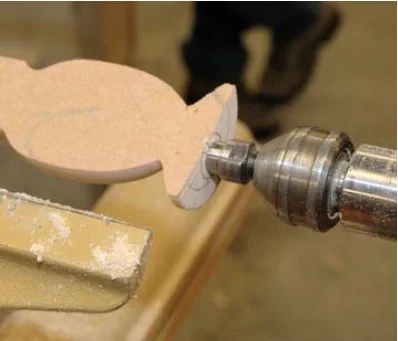
To hollow out the bowl of the spoon, select a method that is available to you such as a power rotary carver i.e. Foredom or Dremel or use carving gouges. Then sand off the remaining paper on the rim of the spoon bowl with a sanding block to keep the bowl flat.
To finish the spoon a coat of mineral oil is good, just like you would use on your cutting boards. Any food-safe finish will suffice.
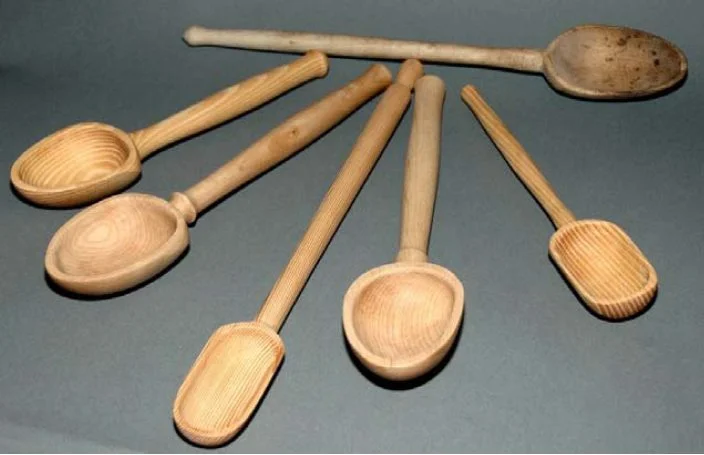
Here are possible forms for the transition between the handle and the bowl. A few of these have the advantage of keeping the spoon from slipping off the trivet.
This project was originally done by Tony Huckert. Thanks, Tony!
Related
- Project: Caddy spoon: another approach to spoon turning with a wooden chuck
- Project: Kitchen spatula: a flat utensil turning project
- Best woodturning tools: the right gouges for spindle work
Written by Vince
Vince is a woodturner and the founder of WoodturningOnline. He writes tool reviews, buying guides, and turning tutorials to help woodturners at every level make informed decisions about their craft and equipment.