Project: Burmese Blackwood Bowl
As an Amazon Associate this site earns from qualifying purchases. If you buy through a link in this article, a small commission comes back at no extra cost to you.
This is a step-by-step photoshoot of a bowl turned by Steve Miller.
Step 1: Prepare
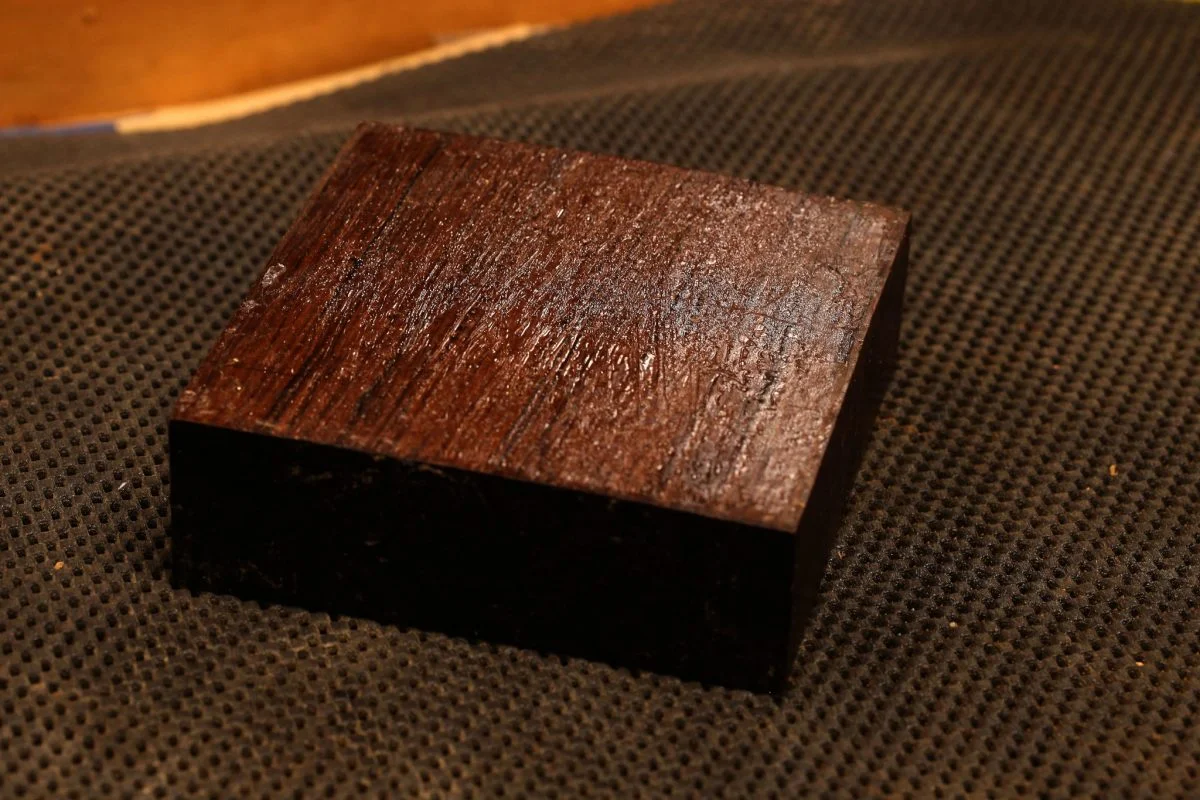
Here I have a block of fancy hardwood (Burmese Blackwood in this case) encased in wax. The wax keeps them from drying unevenly and warping or splitting.
Step 2: Put on a Faceplate
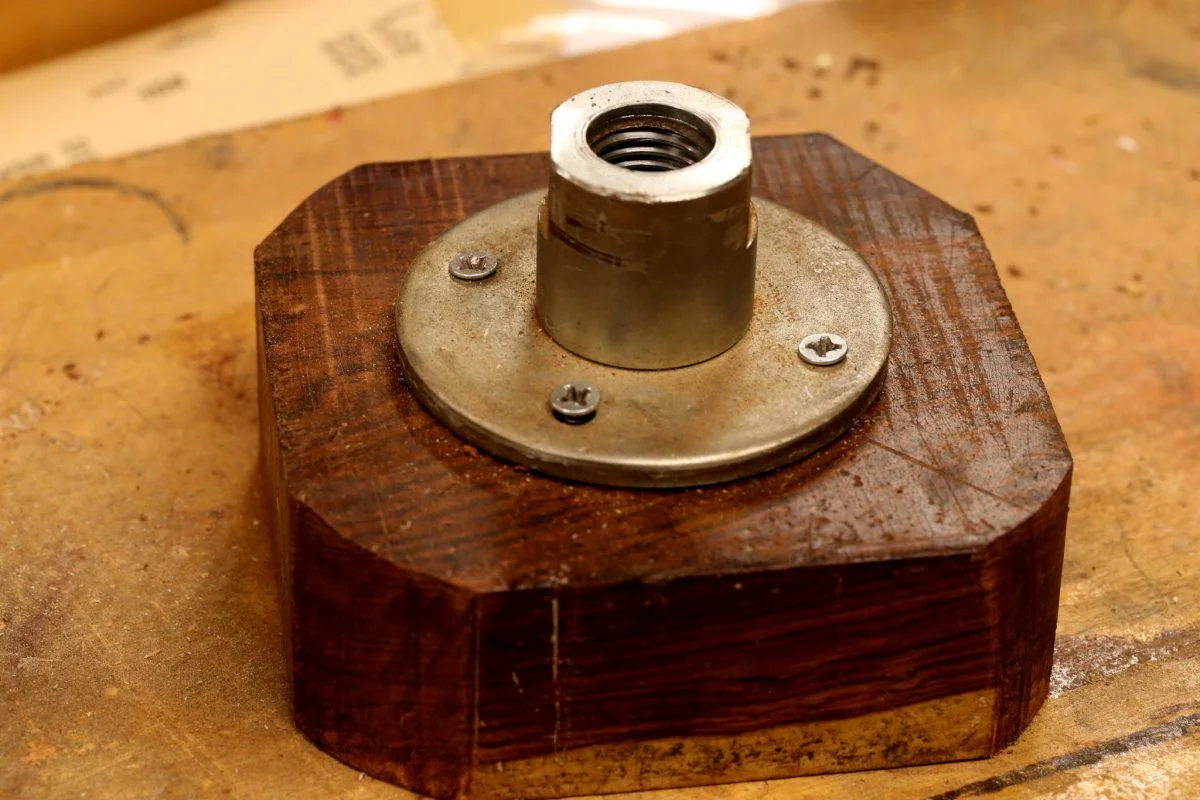
There are a number of methods for doing this. I use the faceplate method.
A faceplate is screwed onto the turning blank and the corners are knocked off with a bandsaw. You can see remnants of the diagonal lines used to find the center.
A hole is drilled at the center and a dowel is inserted to center the faceplate for attaching with screws. You can see the inside of the faceplate column is threaded for mounting on the lathe's headstock.
This particular block is cocobolo, a dense tropical hardwood with unpredictable grain that can go from straight to interlocked within an inch. I'll show later stages of this when I have a chance to work on it later in the week.
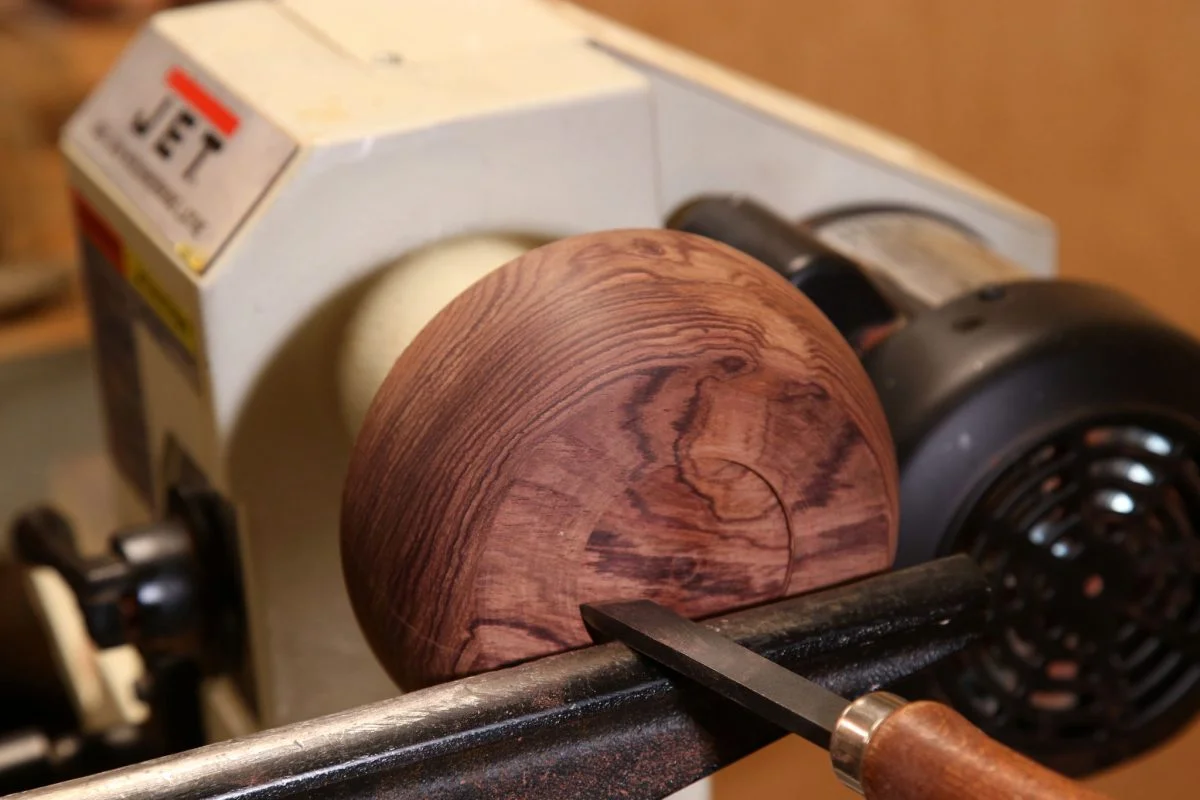
Step 3: Mount the Faceplate and Start Turning
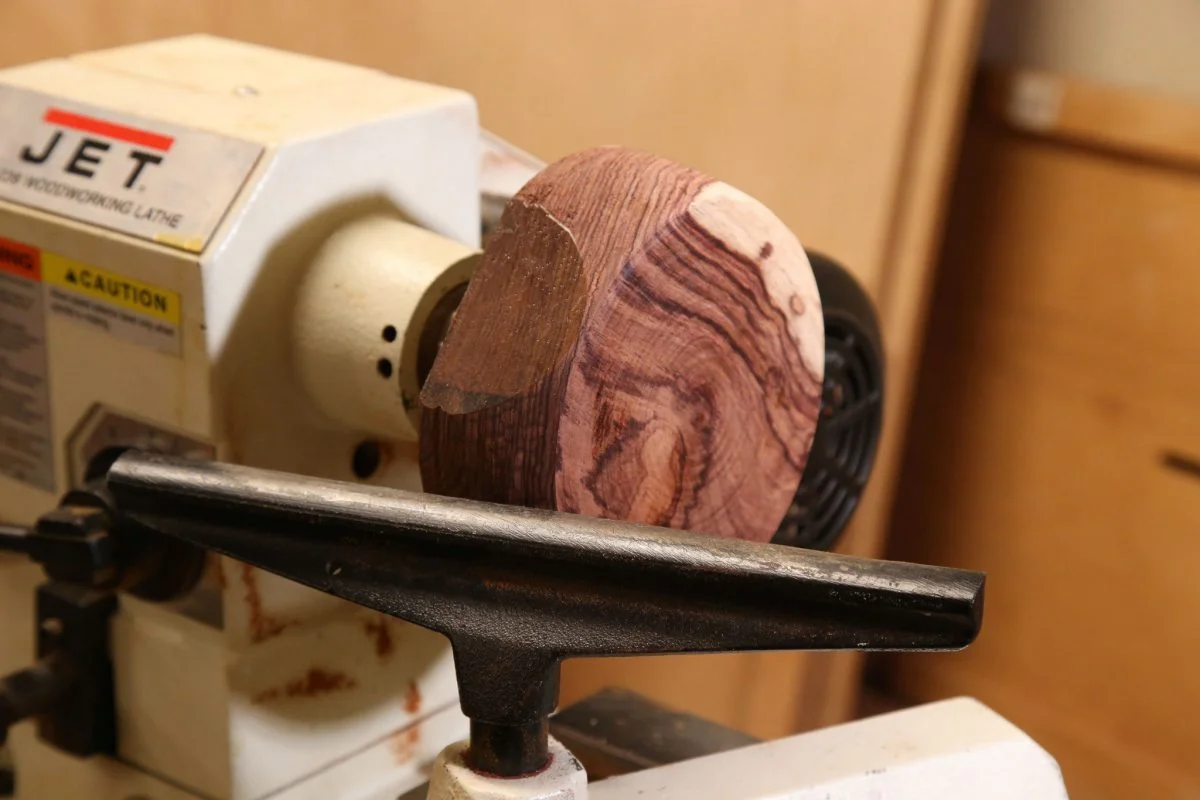
In this shot, you can see the faceplate mounted on the lathe. The wax has been scraped off the bottom (the top of the bowl is the surface the faceplate is mounted to). And you can see that the turning process has begun, with the corners being rounded.
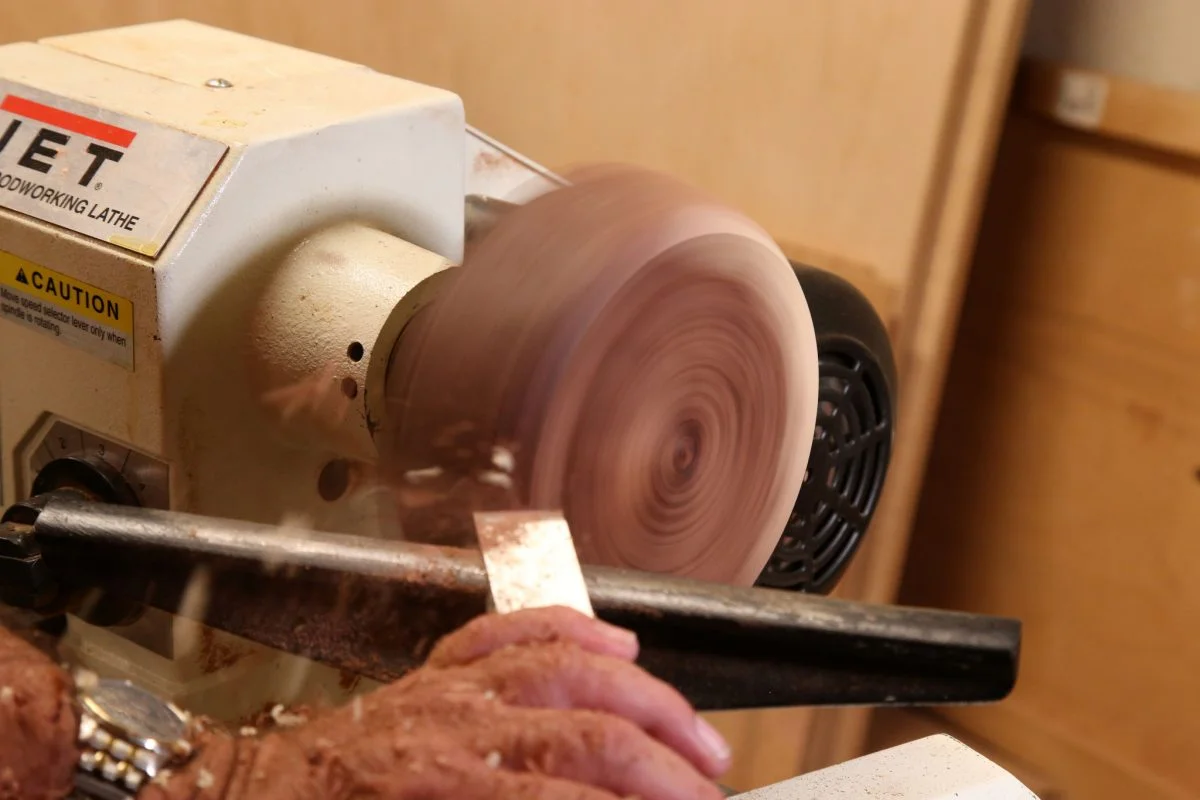
At the bottom of the bowl, it is completely round. It will be further shaped with the bottom slightly smaller in diameter to the top. The metal bar through the middle of the image is the tool rest, where the cutting tool is placed to hold it while turning.
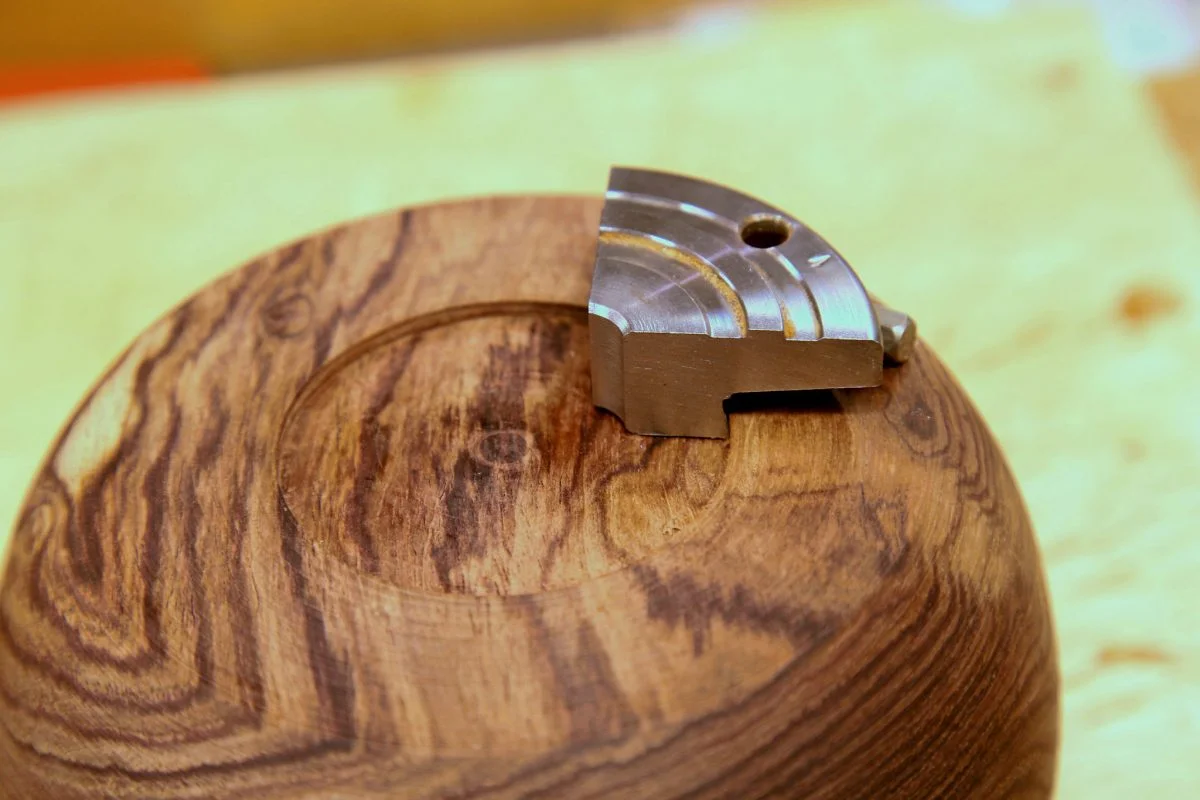
Step 4: Finish Shaping and Prepare for the Novachuck
Here the final shaping has been done and a cutout has been excavated to accommodate dovetail expansion jaws on a tool called the Novachuck. This is one brand of self-centering scroll chucks. The jaws can be expanded and contracted to accommodate a range of cutout sizes. They are expanded to press tightly into the cutout, holding the workpiece in place.
The remainder of this step is more sanding before mounting on the chuck. The next step is to put the piece on the chuck and hollow the bowl out. Unfortunately, the sapwood (light color) seen in previous shots almost vanished when the final shape was reached.
Step 5: Put on the Expansion Jaws
One dovetail expansion jaw (out of four the hold the bowl in place) that attaches to the Novachuck base. The jaws are designed to expand into a dovetail cutout to hold the bowl. This just shows how the jaw fits into the cutout. It is a smaller version of the one that will be actually used (which is currently in use for another bowl).
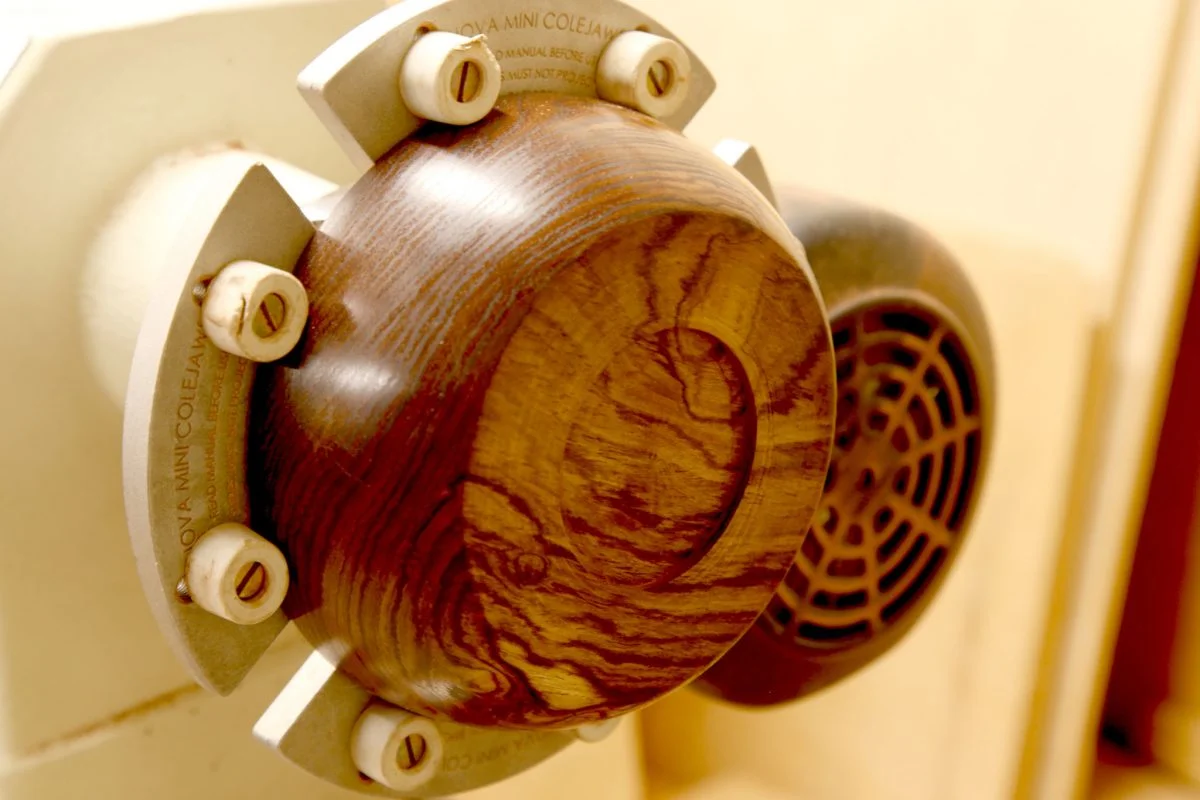
Step 6: Prepare the Scroll Chuck
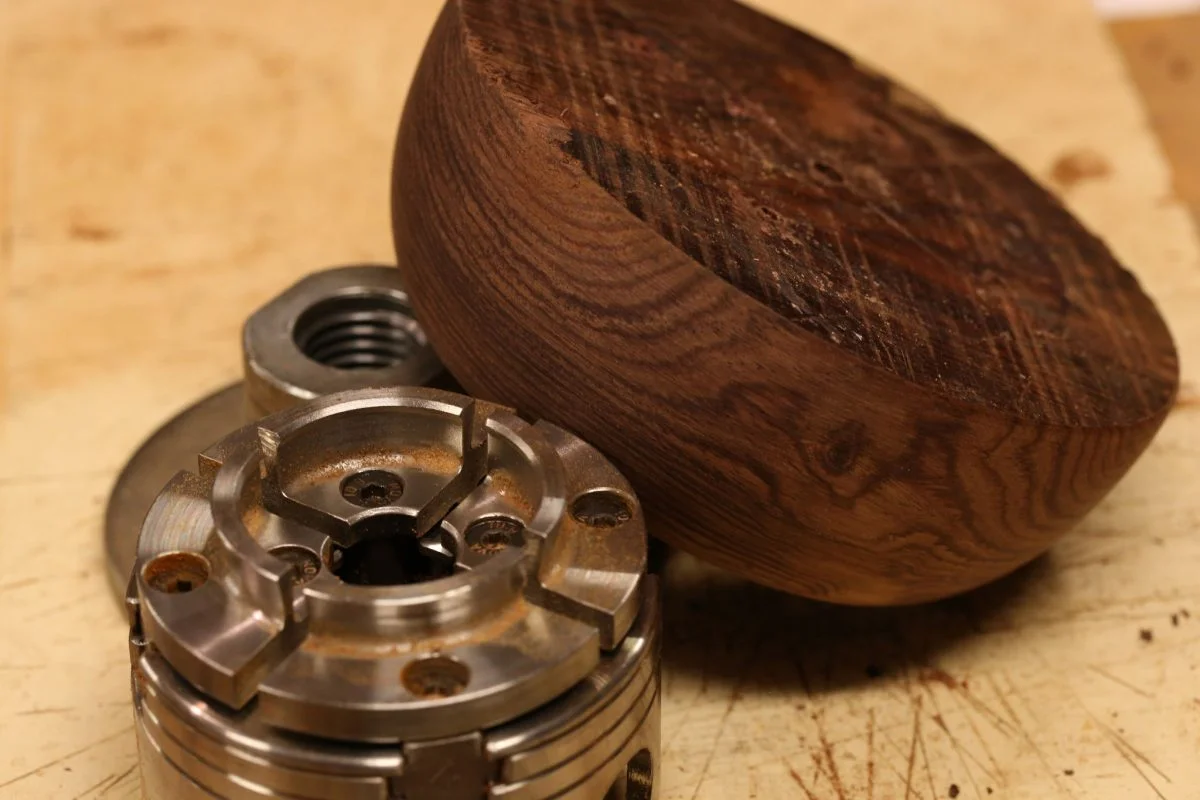
This shows the shaped blank removed from the faceplate (which it is resting on). In the foreground is the scroll chuck it will be mounted on (via the dovetail cutout on the bottom of the bowl). The chuck jaws are shown slightly open.
Step 7: Hollow Out the Bowl
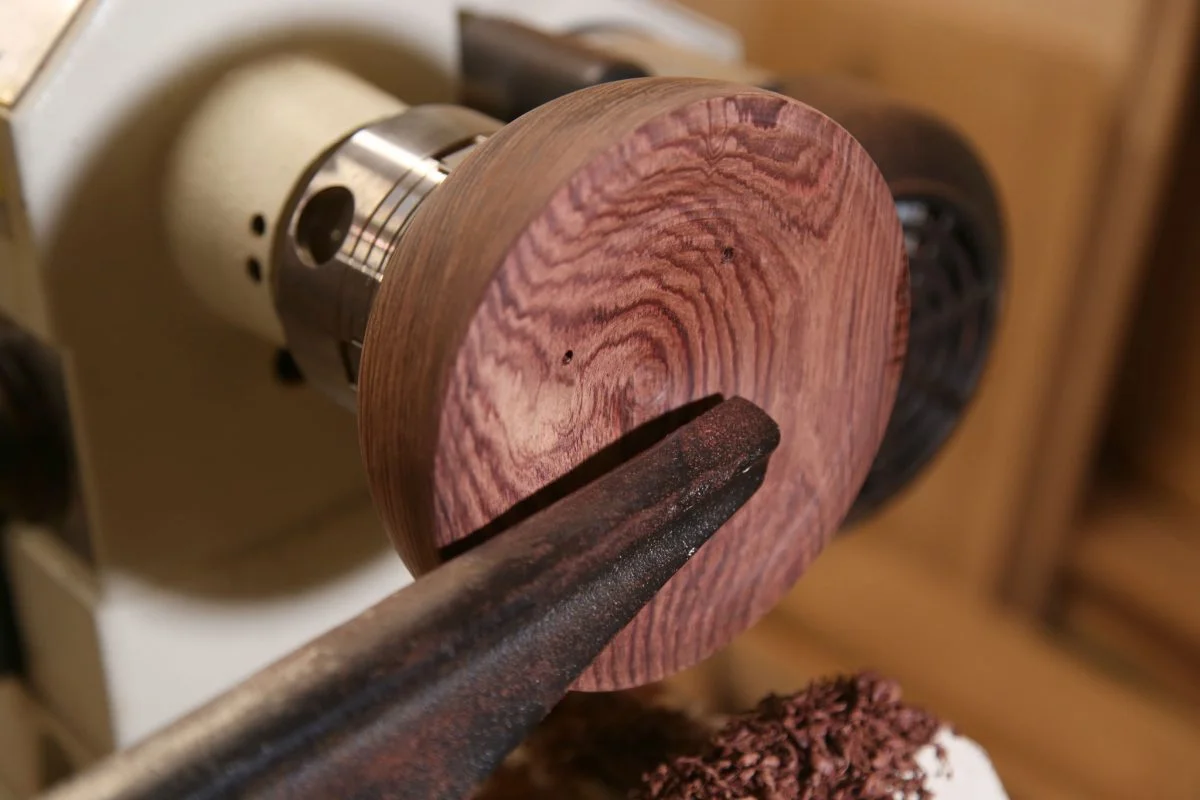
This shows the shaped blank mounted on the scroll chuck, and the bowl partially hollowed out. Shavings from this can be seen beneath the bowl piled on the lathe frame. You can see how different the grain can look as the operation continues.
The two holes you can see are where the faceplate was originally screwed on. These will disappear shortly, as the bowl deepens.
Step 7: Sand Down the Bowl
This shows the bowl almost completely shaped. I spent time sanding but discovered that a few gouge grooves were too deep to sand out, so they will need to be removed with a scraper. The shape will not be materially affected, although the walls may end up thinner than originally intended.
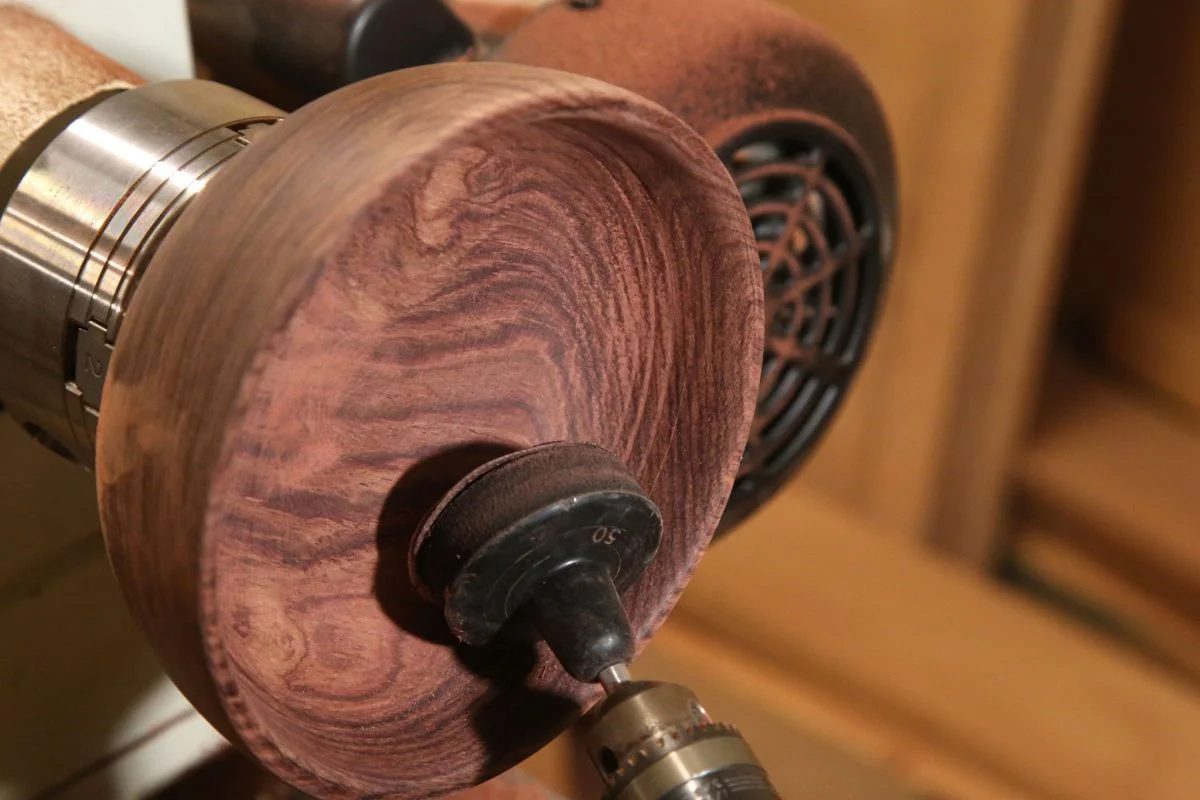
Shown with the bowl is a sanding pad attached to an electric drill. Sanding goes fairly quickly with the combination of a rotating workpiece and a spinning sanding pad.
Step 8: Sand Down Further and Finish
Here the bowl is face down in a compression chuck (actually a different set of jaws on the same chuck seen in previous pictures. The inside has been finished. This step allows the bottom to be flattened and to get rid of the dovetail socket, which is no longer needed.
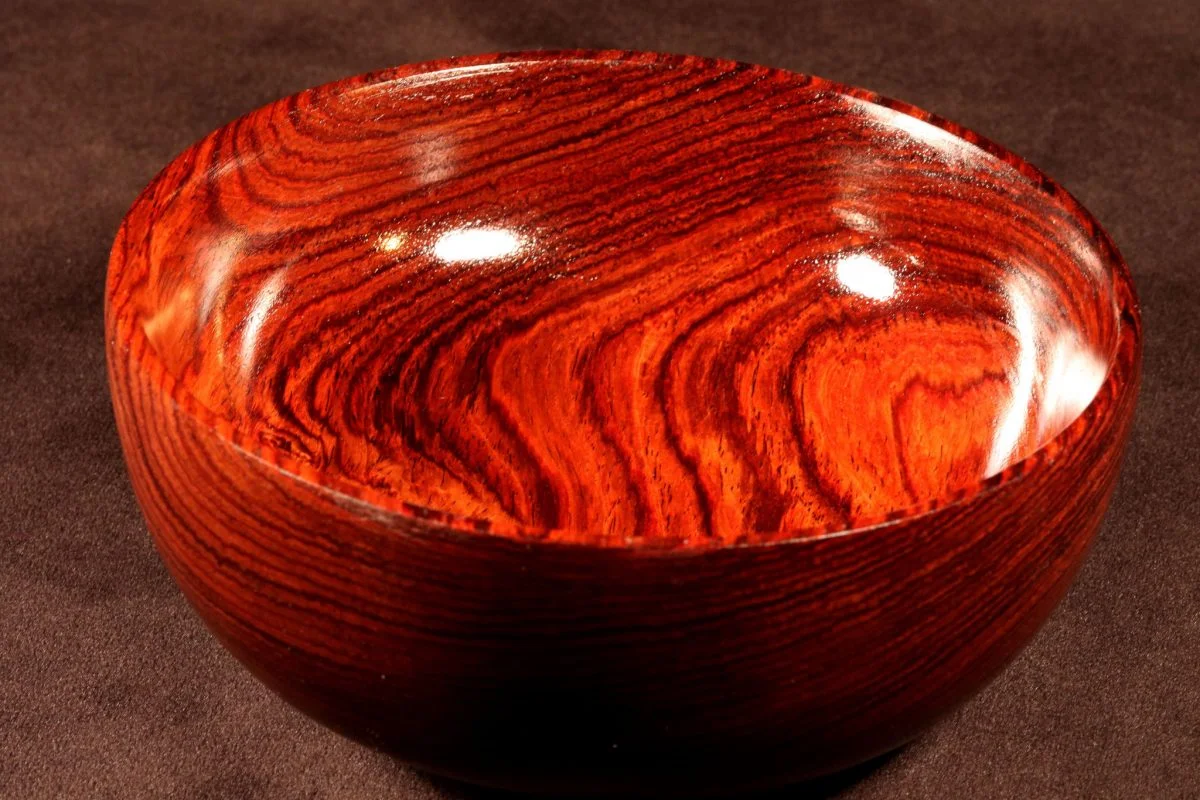 Done!
Done!
Thanks, Steve!
Hope you liked the project. Let us know.
Related
- Best wood for woodturning — species guide including exotic hardwoods
- Lathe chuck types — choosing the right scroll chuck for bowl turning
- Best woodturning tools — gouges and scrapers for bowl projects
Written by Vince
Vince is a woodturner and the founder of WoodturningOnline. He writes tool reviews, buying guides, and turning tutorials to help woodturners at every level make informed decisions about their craft and equipment.